Friday, August 29, 2014

Recipe: Garlic Grilled Scallop Kabobs

Is there anything more fancy, yet simple and summery, than a grilled sea scallop? This delicious recipe is flavored only with fresh garlic and salt, letting the mild, sweet scallops shine on their own. A perfect grilling recipe for a holiday treat this weekend!

As we are moving into our new house this weekend, we may not be posting next week. We wish you a wonderful holiday weekend - with lots of tasty made-from-scratch food enjoyed with family and friends!

Garlic Grilled Scallop Kabobs

(Source: Google Images)
Ingredients:

1 pound medium sea scallops
1/2 tsp salt
2 tsp minced garlic
2 tsp vegetable oil
1 tsp cornstarch
16 to 20 wooden skewers

Directions: 
  • Soak wooden skewers in water for 30 minutes.
  • Rinse scallops under cold water, remove any small muscle on the side of the scallop, then gently pat dry. Lay scallops flat on paper towels.
  • Mix together salt, garlic, oil, and cornstarch in a small bowl. 
  • Brush both sides of scallops with this marinade.
  • Divide scallops evenly between skewers.
  • Lightly oil the grill rack and turn on grill to preheat to medium-high. 
  • Place scallops on the grill for 1 to 2 minutes, just until starting to brown and grill marks form, then turn the scallops and grill the other side for an additional minute or two.
  • Remove and serve immediately on top of a green salad, or with dipping sauce.

Want More Super-Simple & Delicious Grill Recipes?


Wednesday, August 27, 2014

Recipe: Grilled Turkey Burgers With Mango Chutney

These simple burgers will be a hit with those who like a grilled meal on the lighter side. Perfect for a fancier meal, date night, or a holiday barbecue!

Grilled Turkey Burgers With Mango Chutney
(Serves 4.)

Ingredients:

1 long baguette (about 16 inches)
1 medium sweet onion
1 pound ground turkey - organic and free-range if possible
4 Tbsp mango chutney, divided
2 cups shredded organic lettuce or baby salad mix

Directions:
  • Prepare the grill to medium-high heat.
  • Cut baguette in 4 equal pieces and slice each piece open lengthwise; then with your fingers, remove about 1/2 the soft bread from the insides. then split each piece horizontally and pull out half the soft bread from each side, forming a boat.
  • Cut onion in half, around the equator, and dice half finely and slice 4 thin circles out of the other half.
  • In a large bowl, put the diced onion in with 1 tablespoon chutney and all the ground turkey; then mix together with your hands and form 4 burgers.
  • When grill is ready, put round onion slices on and cook 2 or 3 minutes on each side just until charred; remove.
  • Put burgers on at the same time and grill, flipping once, until meat is cooked through, about 5 to 6 minutes each side; remove.
  • Put bread pieces of grill if desired just to char the edges, about 1 or 2 minutes; remove.
  • To assemble - spread the remaining mango chutney on the open sides of baguette pieces, add the turkey burgers on 4 bottoms, put the grilled onion slices on top, then add lettuce and top with top bread piece.

Monday, August 25, 2014

Charcoal vs. Gas Grills – And The Winner Is...?

Next week you may be pulling out the grill for a family Labor Day picnic - but which type of grill will you use? There is an ongoing debate between the two tribes of grilling - charcoal or gas. Today we are going to use specific guidelines to determine a winner - although of course you can also judge for yourself! For our contest, we will judge the grilling performance in four categories: time to heat, temperature control, consistency, and taste.

The time to heat will be decided on the amount of time it takes from ignition until the grill is ready to be cooked on. Control of temperature is judged on how easy it is to, well, control the temperature. Consistency is the ability to keep the heat source going consistently for the entire cooking period. And taste is determined by... okay, let's just go ahead and give this one to charcoal right now. Everyone agrees that cooking with charcoal just tastes better. On to the judging.

Charcoal

Beef and Corn on a Charcoal BBQ grill
Beef and Corn on a Charcoal BBQ grill (Photo credit: Wikipedia)
There are many ways to light a fire, but only one works really well in getting charcoal hot and up to temperature quickly; and that is using a chimney starter. Unless you already have an extremely hot fire burning, it is rather time consuming to get charcoal to light correctly. A chimney is a metal tube with an opening in the bottom and top. This allows a good flow of air while still keeping the charcoal close enough together to get hot at the same time. This process takes about ten minutes to get hot and then another two after they are dumped out to get the grill ready to cook on.

Temperature control is easy to learn with a charcoal grill, but you have to do it right. You can create hot or cold areas by stacking more or less of the briquettes in one area. You can keep the temperature more even all over the surface by spreading the briquettes out. All it takes is a quick wave of the hand over the grill to identify hot and cold areas, then it is on to the cooking.

Charcoal heat can last a relatively long time when the grill is open or if there is a good flow of air through the grill, but you have to make sure you have the air adjusted properly. Having the right air flow keeps the embers glowing without having them burn out too fast, or having them go out.  It's a matter of getting to know your grill.  If you close off the air flow either with the cover or the bottom slots, your charcoal will die out.  If you leave your grill wide open, your charcoal will burn out.  You've got to learn the right mix of air, but when you do, your fire will last plenty long enough to grill what you want.

Most grill aficionados will give the flavor award to charcoal.  Even diehard gas grill users will do what they can to get a charcoal flavor from their gas grill.  If you've ever walked through a neighborhood where residents are busy firing up their grills, the aroma you smell that makes you go 'ahhhh' is coming from the charcoal grills.  Gas grills simply do not give you that same aromatic effect. Charcoal is, by far, the best when it comes to taste.

Gas

Turn a knob, press a button and you have instant fire. You can go from ignition to ready-to-cook in a matter of five minutes. There will be a little learning curve as you find out just how to set the dials to get the required temperature.  Most recipes for grilled foods will give you a general temperature guide such as “over medium-high heat” or “grill set to high heat” etc.  Very few recipes actually tell you 400 degrees.  So, yes, your grill is hot in minutes with just a few clicks, but you have to learn through experience where your dials will lead you.

English: A photo of a propane gas grill.
Gas grill. (Photo credit: Wikipedia)
While it takes almost no time to heat up, there are a few issues when it comes to controlling the temperature. Sure, you can see what the temperature is inside the grill by that nifty little gauge on the cover, but when it comes to heating individual areas, you might run into a little problem. The structure of the gas jets running around the grill will give you hot and not-so-hot spots on the grill's grates.  Some bigger grills solve this by running gas jets through the middle of the grill as well as around the perimeters.  However, many grill recipes call for placing food on direct heat at first, then moving to indirect (those cooler spots in the middle), or cooking entirely on indirect heat. So the structure of the gas grill actually adds to the versatility of cooking on the grill. The bigger gas grills with the extra jets through the middle have the ability to turn off that middle gas line, so you still get an area that offers indirect heat. Problem solved.

Consistency is spot on with a gas grill. You can pretty much cook for as long as you have gas, and typically in any weather. When you close the lid, the grill stays lit so you don't have to worry about air flow through the unit to keep the fire going.  If you've got a big fat chicken on the rotisserie, you don't have to worry about the heat dropping as the charcoal burns down, being left with an undercooked bird.  A tip for serious gas grill users is to keep two gas tanks on hand – one on the grill and a back up. Watch your gas gauge and you'll never have to worry.

When it comes to taste on a gas grill, I don't want to suggest that the food doesn't taste good.  It does, but in comparison to charcoal grilled food, well, there's that 'ahhhh' effect again. Charcoal grilled food just has the 'grilled' taste that we all know and love.

The Winner

If grills were judged on taste alone, you know what the outcome would be. But this decision might just surprise you. The clear winner in this contest is gas. While the learning curve on the temperature may be a bit steep to begin with, once you learn it you will be an expert.  And just the sheer speed of lighting and the ability to cook in any weather makes gas grills very difficult to beat. So get out there, crank your knob, push your button, and get grilling!  And, if you happen to disagree with me, then get out your charcoal and enjoy your tasty grilled meal!


Friday, August 22, 2014

Recipe: Exotic Quinoa Risotto

For those wanting a unique and delicious twist on a classic gourmet dish, quinoa is a great choice. Keep in mind that risotto made with quinoa will not be as creamy as that made with arborio rice; however, it will have a unique and slightly crunchy texture that will have your guests coming back for second helpings! For even more of a "wow" factor, use black or red quinoa for a visually stunning dish.

Exotic Quinoa Risotto
(Serves 6.)

Ingredients:

Shiitake mushrooms
Shiitake mushrooms (Photo credit: Wikipedia)
1 tbsp olive oil
1/2 chopped yellow onion
1 minced garlic clove
1/2 cup fresh shiitake mushrooms, sliced thin
1/4 cup grated Parmesan cheese
1/2 tsp salt
1/4 tsp black pepper
1 cup quinoa, rinsed well
2 1/4 cups low-sodium vegetable broth
2 cups arugula, stems removed and arugula chopped
1 carrot, peeled and finely shredded

Directions:
  1. Heat olive oil in a large saucepan over medium heat.
  2. Add onions and saute about four minutes until translucent. Add quinoa and garlic; cook an additional minute, stirring occasionally. (Garlic should not be allowed to brown.)
  3. Add broth and bring to a boil. Reduce to low heat and simmer about twelve minutes until quinoa is  tender but still slightly hard at the center. 
  4. Stir in arugula, mushrooms, and carrot, then simmer about two more minutes until quinoa grains become translucent. 
  5. Stir in cheese and season with salt and pepper to taste, then serve immediately.

Wednesday, August 20, 2014

Recipe: Green Bean Salad With Black Quinoa

This visually intriguing dish contrasts black quinoa with bright green beans for a hearty, summer salad packed with protein, fiber, and flavor. This is even better left over for the flavors to combine, and makes a great lunch that will keep you full and satisfied all day - and will have everyone at the office asking what you're eating!

Green Bean Salad With Black Quinoa
(Serves 4.)

Dressing Ingredients:

1/4 cup olive oil
3 tablespoons White balsamic vinegar
2 teaspoons honey or agave nectar
1 clove fresh garlic, minced
one handful of basil Leaves
salt and pepper, to taste

Salad Ingredients:

English: Cut Green Beans Español: Habichuelas ...
Cut Green Beans.(Photo credit: Wikipedia)
1/2 Cup black quinoa
1 pound green beans, trimmed
2 green onions
1/2 Cup hazelnuts, skinned, toasted, and roughly chopped

Directions:
  1. Blend all dressing ingredients together in a food processor or blender.
  2. Season with salt and pepper as needed and refrigerate.
  3. Bring 1 cup water to a boil and add quinoa. Reduce heat, cover, and simmer, for about 20 minutes until all liquid is absorbed. Transfer to a large mixing bowl to cool.
  4. Steam or blanch green beans until just barely soft. Drain well and add green beans to cooled quinoa. 
  5. Slice scallions thinly and add with half of the chopped hazelnuts.
  6. Toss with desired amount of dressing and season with fresh ground black pepper along with the rest of the hazelnuts.

Monday, August 18, 2014

Cooking With Quinoa: 3 Tasty Varieties

There may be over 100 varieties of quinoa, but the three main types of quinoa sold commercially are what we will most likely be cooking with. Each has its own characteristics that makes it completely unique from the others.  Let's take a bite out of each of these different varieties and see where they can be used in the kitchen.

Gold Quinoa

Français : Quinoa cuit.
Cooked gold quinoa. (Photo credit: Wikipedia)
The gold, or cream colored quinoa, is generally the most common variety. Not only can you find it abundantly in the stores, but it also has the most “typical” taste.  As it is the most common type of quinoa, the other forms of quinoa are compared using this point of reference. One of the most familiar aspects of the gold quinoa is that it tends to keep its cream color and is a bit fluffier, lighter, and creamier than the other varieties.  It has a texture that mixes well with many foods and is easily incorporated into baked goods.

Gold quinoa is used hot in main dishes and side dishes, and cold in salad. Because of its tender, light texture, gold quinoa is also a favorite as a breakfast cereal as it easily mixes well with milk for a hot oatmeal substitute. Think about how you often see rice or couscous used in dishes - gold quinoa can be used in much the same way.

Red Quinoa

English: cooked red quinoa
Cooked red quinoa. (Photo credit: Wikipedia)
Red quinoa has a slightly crunchier texture than the gold quinoa and has a bit sharper, or even some would say a bitter taste. There is also a nutritional difference between the varieties, as the red quinoa is found to be higher in protein and calories, with three grams more fiber per serving than its golden counterpart. Besides the nutritional differences, there is a big “wow” factor in red quinoa with the color and the texture.

Not only does the flavor stand out, but the color is a unique dark reddish purple color. Pairing red quinoa with fresh fruit and vibrant vegetables is a great way to make your dish stand out from the crowd. Because of the slightly increased bitter taste, red quinoa goes well with creamy or sweet foods like butternut squash and avocado. Even some cheeses, especially those with a soft texture, pair well because the snappy red quinoa compliments the rich creamy cheese so well. Because of the texture, red quinoa can often be used as a substitute for ground or finely chopped nuts, such as to top a salad.

Black Quinoa

Cooked Black Quinoa (Source: Google Images)
Black quinoa, while still one of the more rare commercial forms of quinoa, is becoming more widely known. The reason you do not find black quinoa on the shelves very often is that it is only grown in difficult climates and currently cannot be produced in large quantities. The black color is not only rare, but has an exotic appeal. Black quinoa leans toward a subtly sweet flavor and has a crispier texture, similar to the red quinoa, but even more so.

The exotic look and firm texture of black quinoa stands up well to citrus and other fruits.  Consider an Asian pear salad with black quinoa;  the black and white coloring alone is intriguing, but the flavors are just as amazing. Black quinoa often comes out of harsh environments, it is a sturdy variety.  You can hardly over cook it.  It won't disappear into mush and it stands up to long baking times.  It's a less fluffy variety and maintains its crisp, grainy, almost nutty texture in any dish. Black quinoa almost demands a dish with many layers of flavor and textures.

No matter what kind of quinoa you decide to eat, your family will be getting a wide range of vitamins and minerals as well as a great complete protein. So pick up a bag and give a new recipe a whirl. You might just discover a new family favorite!

Check back later this week for some tasty quinoa recipes!

Friday, August 15, 2014

Recipe: Summer Squash With Broccoli & Chicken Stir-Fry

Nothing says summer like summer squash - and this time of year, many gardeners are inundated with it! Here is another recipe to help you use up the bounty. This simple stir-fry abounds with healthy vegetables, and the addition of turmeric fights inflammation and is good for blood flow. (Be sure to check out Wednesday's recipe for another stir fry with zucchini!)

Summer Squash Duo With Broccoli And Chicken Stir-Fry

Ingredients:

USDA summer squash
Summer squash. (Photo credit: Wikipedia)
3 Tbsp. high heat oil (peanut, coconut, macadamia)
4 boneless-skinless chicken breasts, cubed bite size
2 medium zucchini squash, sliced thin
4 small yellow squash, sliced thin
2 medium onions, sliced into thin strips
10 oz. fresh or frozen broccoli, chopped
1 tsp. fresh minced garlic
1/2 tsp. salt
1/2 tsp. pepper
1 tsp. turmeric
1 tsp. thyme

Directions:
  • In a wok or large heavy skillet, heat the oil until sizzling hot.
  • Add chicken to the wok, and cook quickly, stirring constantly until the chicken is almost cooked through.
  • Add the vegetables and cook quickly, stirring constantly, until just starting to soften, then sprinkle with the seasonings, stir and cook until chicken is done and vegetables are crisp-tender. 
  • Serve immediately.

Wednesday, August 13, 2014

Recipe: Spinach, Pepper & Zucchini Stir-Fry With Soba Noodles

Summer is the perfect time for quick and easy stir-fry, filled with delicious, fresh garden veggies! This tasty version uses sesame oil and soy sauce with soba noodles for a quick, healthy, Asian-flavored meal. And be sure to check back Friday for another great recipe to help you use up all that summer squash!

Spinach, Pepper & Zucchini Stir-Fry With Soba Noodles 

Ingredients:

日本語: 蕎麦乾麺(熊本県下益城郡城南町坂野94、五木食品http://www.itsuki...
Soba noodles (made from buckwheat flour). (Photo credit: Wikipedia)
10 ounces soba noodles
1 tsp. olive or coconut oil
1 red bell pepper, sliced thin
1 yellow bell pepper, sliced thin
1 zucchini, diced
1 1/2 cups chopped fresh spinach
1/4 cup diced chives
2 garlic cloves, minced 
2 tsp. sesame oil
3 tsp. soy sauce
1 Tbsp. sesame seeds

Directions:
  • Cook the soba noodles according to the package directions, drain and set aside.
  • Heat a wok over medium high heat, add the olive or coconut oil, and when it gets sizzling hot, add the peppers, cook and stir until they soften slightly.
  • Now add the zucchini and cook for a couple more minutes. 
  • Now add the spinach, chives, and garlic, and cook for another couple minutes.
  • Now add the sesame oil, soy sauce, and sesame seeds, stirring and cooking for just a minute. 
  • Serve in shallow bowls, spooning hot stir-fry over soba noodles.

Monday, August 11, 2014

The Four Natural Enemies of Olive Oil

A high-quality extra virgin olive oil is a must-have staple in many kitchens, partly because its delicious flavor and versatile nature allow it to be used in countless ways. For starters, extra virgin olive oil is perfect in homemade salad dressings, on roasted vegetables and as a key ingredient in a wide range of recipes.

In addition to tasting great, olive oil is also good for you. Naturally low in saturated and polyunsaturated fats, it is a healthy alternative to margarine and many other vegetable oils. Versatility, great taste and a healthy profile make it easy to see why many cooks and chefs always have a bottle close at hand.

What many people do not realize about olive oil, however, is that it is actually a perishable fruit juice with some finicky preferences. This mean proper care and precautions must be taken in order to keep your olive tasting and smelling the way it should, and preserve its health benefits.

The Four Natural Enemies of Olive Oil


A 1-liter glass bottle and bowl Bertolli brand...
Extra virgin olive oil. (Photo credit: Wikipedia)
1. Time. Because it is a perishable fruit oil, olive does not have an unlimited shelf life. Try to choose bottles with a clearly marked “harvest date” and make sure that date occurred within the last 18 months to 2 years. It is also recommended that you only buy as much olive oil as you can use within 30 – 60 days of opening.

2. Temperature. Heat will cause olive oil to degrade quickly. Therefore, do not store your olive oil near your oven or cooktop because the higher ambient heat in those areas will cause it to break down faster.

3. Oxygen. Like a fine wine, exposure to oxygen for any length of time will cause your olive oil to turn rancid. To prevent this, store your olive oil in an airtight container with the lid securely fastened whenever it is not in use.

4. Light. Exposure to light will also cause olive oil to degrade more quickly. Avoid storing your olive in clear bottles or out on your counter tops. Dark green bottles are the best for blocking out sunlight, but other dark bottles will also work. Storing bottles inside a cabinet when not in use can also prolong the life of your olive oil. A cool, dark place is your best bet to prolong the life of your oil.

Like any rancid oil, rancid olive oil is not healthy to consume. Avoiding the four natural enemies of olive oil will keep it fresh, healthy and full of flavor for a longer period of time. With a little bit of effort, you can preserve the delicious natural flavors and healthy properties of your quality olive oils.


Friday, August 8, 2014

Recipe: Sweet Balsamic Glazed Grilled Peaches

Who says the grill is only for meat and vegetables?  What about dessert? This amazing and simple grilled fruit recipe will soon become one of your summer favorites. Beautiful and delicious, these peaches topped with a balsamic glaze are a gourmet treat you won't soon forget! For a slightly different summery and floral flavor, rub peaches with coconut oil instead of olive oil.

Sweet Balsamic Glazed Grilled Peaches
(Serves 4-8.)

Ingredients:

Grilled Peaches
Grilled Peaches (Photo credit: Another Pint Please...)
4 ripe peaches, pitted and halved
olive oil
1/2 cup good quality balsamic vinegar
1 tbsp agave or other liquid sweetener (real maple syrup, honey)
1 tbsp lemon juice
1 tsp almond extract
mint leaves for garnish, optional

Directions:
  • Preheat your grill to medium-high.
  • Coat each peach half with olive oil and place on the grill cut side down; cook for 4 to 5 minutes each side, just until grill marks appear.
  • Prepare the glaze while peaches are grilling; in a small saucepan, bring vinegar to a boil over medium-high heat. Cook until vinegar is reduced by half and thickens slightly. Add lemon juice, almond extract, and agave, stirring to combine.  Remove from heat.
  • Remove peaches from the grill and place face up on a dessert dish. 
  • Drizzle with balsamic glaze and serve immediately. 
  • For added flavor, garnish each peach with a mint sprig.

Wednesday, August 6, 2014

Recipe: Simply Perfect Grilled Salmon Fillets

It would be hard to find a recipe simpler than this one! This is why cooking on the grill is such a great choice for summer meals, when there are so many activities going on, and places you'd rather be than standing over the stove. These are delicious just as they are, but if you want to add a citrusy touch, try grilling with very thin slices of lemon on top - yum!

Simply Perfect Grilled Salmon Fillets
(Serves 4.)

Ingredients:

Grilled Salmon
Grilled Salmon (Photo credit: Another Pint Please...)
2 tsp olive oil
4 (5 oz ea) wild-caught salmon fillets, with skin on
salt to taste
freshly ground black pepper

Instructions:
  • Preheat your grill and brush fillets with oil, then season generously with salt and pepper.
  • Put salmon on hot grill, skin side down; grill until skin crisps and you can lift with a spatula.  Do NOT flip until you can easily loosen the salmon skin and all from the grill grate.
  • Flip and continue grilling fillet on the meat side down for 3 to 4 minutes on each side.
  • Remove with spatula and serve. 
  • Adjust cooking time according to the size and thickness of fillets.
  • Serve with a green salad and/or grilled vegetables, and a crisp white wine.

Monday, August 4, 2014

Summer Grilling Safety Tips

A grill is a great tool to add to your culinary repertoire - and summer is a great time to use it! But grill safety is one of the most overlooked aspects of grilling.  And, like most home accidents, it is usually the smallest detail that is overlooked that leads to the biggest disasters.

Without the right tools and techniques, your grilling may not be safe. With this in mind, today we will be covering tools to use as well as how to handle your grill to stay safe. By keeping these tips and suggestions in mind before you begin grilling, you will have the most delicious outcome, as well as a great time! Let's take a look at the tools and rules that make for a safe grilling experience.

Tools for Safe Grilling

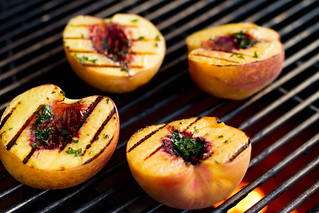
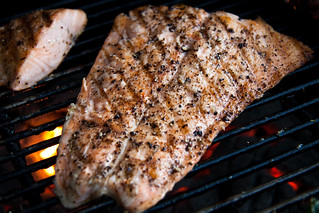
You need the right tools to not only create the best grilled meals, but to do so safely. For instance, you want a good pair of long handled tongs that pinch completely closed so you can easily pick up smaller items, like fruit and veggies. You want tongs that are strong so you can turn heavier items like steak and chicken.  A nice long handled spatula is good, too. But skip the carving fork for turning meat, because every time you poke a hole in the meat, juices run out. The giant carving fork can be used once the meat is removed and rested.

A long handled basting brush is also a necessary tool so that you can mop the sauce or marinade onto the food while it is on the grill. And don't forget the grilling gloves!  These special gloves will keep you safer when moving food around.  Of course, you'll want to invest in at least one basket and vented tray for smaller foods.  Then the sky's the limit.  But, with just these few tools, you will be ready to grill keeping safety as well as success in mind.

Another great tool to have on hand is a set of long grill matches and extra batteries for the grill's ignition switch. If your ignition switch fails, you can safely light your grill to get your cooking underway.  Then, when you have time, replace your ignition battery so you're ready for tomorrow's grilling.

Gas Grill Safety Rules

English: A photo of a propane gas grill.
Propane gas grill. (Photo credit: Wikipedia)
The most important safety tip to keep in mind is to follow your grill manufacturer's instructions to the letter.  Lighting instructions are tedious in gas grills for a reason.  If your gas grill doesn't light, and the instructions say to wait five minutes before attempting to light again, WAIT FIVE MINUTES.  That is not a suggestion – it is a rule.  And in this case, rules are NOT meant to be broken.

Never leave the gas valve open between grilling time.  If there is a small leak, the gas may converge under the closed cover and be there when you go to light your grill the next time.  Very serious mistake. Turn the gas on and off every time you grill.  And never move your grill while lit or when the gas valve is open.

Keep the lid open on a gas grill after cooking for at least 15 minutes to allow the grill to cool down and to let any lingering gas evaporate.  When the grill is totally cool, cover it with a good grill cover.  Many people skip this part, but this is actually a safety tip.  Outdoor debris, sand, and pollen in the air will settle in the gas jets and the dials, eventually leading to clogging, corrosion, or both.  This will not end well.  I guarantee, if you start covering your gas grill, you'll be amazed at how fast your cover gets dirty.  THAT is the dirt that would have landed in your grill's working parts.  See?

Don't forget the maintenance. Your gas grill owner's manual will come with specific maintenance jobs to be done routinely.  If you're not comfortable replacing batteries or gas lines, or cleaning the gas jets and all the connections, then hire someone.  And, yes, spiders will 'nest' in abandoned grills.  That alone may be reason enough to pay someone to clean and maintain your grill on a routine basis. You decide.

Charcoal Grill Safety Rules

Now, we're not just picking on gas grills. Charcoal grills have their own safety concerns.  With charcoal grills, the instructions and maintenance may seem simpler, but it is still important. 

Again, the most obvious safety issues are focused on lighting the fire.  In this case, the tools are charcoal briquettes, or a similar flame producing vehicle, and perhaps a liquid to get the process going.  You'll also have tools to help speed up the process, such as chimneys designed to keep the coals closer together so they ignite each other without the aid of an explosive liquid.

The first and most dangerous component to lighting a charcoal grill is the lighter fluid.  If you opt to use a charcoal lighter fluid, you MUST use an actual made-for-charcoal lighter fluid.  This means no gas and no kerosene.  Let me repeat that;  NO gas and NO kerosene.

English: Preparing grill for grilling, grill w...
Preparing grill for grilling, grill with flames and cones. (Photo credit: Wikipedia)
When using charcoal lighter fluid, follow the instructions carefully.  You'll be soaking the charcoal in the lighter fluid before throwing your match on.  You will not be taking the can and spraying the lighter fluid into a lighted pile of charcoal.  If done correctly, your charcoal should not explode, but should burn quickly at first, then slow to a nice simmer and finally end up with glowing coals.  Even if you use your charcoal lighter fluid correctly, you still want to use a good strong kitchen match, then stand back.

You can also use lighter fluid infused charcoal briquettes that are widely available.  You still need to be careful, but at least you won't have a can of explosive poison sitting around the house.  If that thought scares you, then opt for the infused briquettes.

Or to avoid the whole situation, you may want to buy a simple chimney starter made specifically for charcoal fires.  These are handy-dandy gadgets that are inexpensive to buy and easy to use.  You can eliminate the fluid and fluid-soaked charcoal briquettes entirely.  All you need is a little kindling or paper, a pile of briquettes, and a match.  Remember to set your chimney starter in a safe, stable, out of the way ventilated area.  And remember to wear your grilling gloves whenever you are handling your chimney.

If you are removing the charcoal ash after grilling, be sure the coals have completely gone out.  Then dump them in a metal container like a bucket to store for at least several days before discarding.  Only move the grill when it is completely cooled down after grilling.  Never attempt to move a hot grill.  People are burned and fires are started just by breaking this one rule.

Think seriously about the location of your grill.  You need to set up an outdoor area, at least two feet away from a combustible wall, and on a fire-safe surface.  Grilling, whether gas or charcoal, must not be done in an enclosed area;  not even a screened-in porch.  The gases from the charcoal or the propane will gather in the corners and hover, possibly undetected, until someone gets sick, or worse.

Okay, now that I've got you totally scared, I'm here to tell you that grilling out is nothing to be afraid of.  It is, however, a serious business.  You must be mindful of how you operate your grill.  Use the right tools and follow these safety tips and you will enjoy your grilling experience more than ever!

Now that we've got that out of the way, be sure to check back later this week for some tasty summer grill recipes!

Friday, August 1, 2014

Recipe: Tangy Dijon Salmon Cakes

Grilled salmon is great, but what if you want something a little bit fancier? You can't go wrong with these simple, flavorful salmon cakes - great for a potluck or summer dinner party. Lemon, mustard, and thyme provide lots of great, tangy flavor, and a bit of hot sauce gives them just a tiny extra kick (add more if you like a bigger kick).  This can also be a good way to use up leftover salmon that you didn't grill the night before.

Dijon Salmon Cakes

Ingredients:

Dijon mustard on a spoon. Français : Moutarde ...
Dijon mustard. (Photo credit: Wikipedia)
1 pound fresh salmon filets, skin and bones removed, cut into chunks
1 egg  
1 teaspoon hot sauce
1 tablespoon Dijon mustard
2 teaspoons lemon zest, finely grated
1 1/2 teaspoons salt
1/2 teaspoon pepper
1 tablespoon fresh thyme, chopped 
2 tablespoons cooking oil

Directions:
  • In a food processor, add the salmon and pulse until chopped but still medium coarse. You don't want to over process it; make sure you still have some texture.
  • In a separate large bowl, add the egg and lightly beat, then turn the salmon mixture out into the bowl with the egg; gently mix with a rubber spatula.
  • Add the hot sauce, Dijon, lemon zest, salt and pepper. Mix gently, then cover the bowl with plastic wrap and chill for 30 minutes to 1 hour.
  • Once chilled, divide into eight equal portions, then shape into patties. Sprinkle patties all over with thyme.
  • In a large skillet over medium high heat, heat the oil. Once it is hot, reduce heat and add the salmon patties. Cook until nicely browned, then carefully flip and cook on the other side until golden brown. This will take about 3 to 4 minutes per side.
  • Serve immediately.