Friday, January 31, 2014

Recipe: Indian Spiced Lentils And Brown Rice

This hearty one-pot meal brings flavors of the Orient to your dinner table, with lots of pungent spices, brown rice, and lentils, and makes a good "Meatless Monday" recipe, or an excellent side dish for an Indian meal. This one may be adapted to the crockpot, or will cook fine on the stovetop in just about any type of pot.

Indian Spiced Lentils And Brown Rice
(Serves 2-3 as a main dish, or 6-8 as a side dish.)

Ingredients:

1 Tbsp butter
1 Tbsp olive oil
1 medium onion, diced small
1/2 tsp kosher salt
1/2 tsp ground cinnamon
1/2 tsp ground ginger
1/2 tsp ground cardamon
1 bay leaf
1/2 cup brown rice
1/2 cup lentils, rinsed
2 1/2 cups water
1 Tbsp heavy cream (optional)

Directions:
  1. In a large pot, put the butter and olive oil over medium heat, stirring until butter is melted.
  2. Add the onion and cook just until softened, stirring often.
  3. Add the salt, cinnamon, ginger, cardamon, and bay leaf, stir and cook for 1 minute, then add the brown rice and lentils, stirring to combine. 
  4. Add the water, stir, turn heat to low, and cover the pot.
  5. Simmer for 45 to 55 minutes or until the lentils and rice are tender and liquid has been absorbed. Remove from heat and stir in heavy cream if desired. Serve immediately.
Enhanced by Zemanta

Wednesday, January 29, 2014

Recipe: One-Pot Beef Bourguignon Peasant Stew

Here is a tasty, hearty recipe full of rich flavors for a cold winter night like we've been having so many of lately! This one is best cooked in a stainless steel pot, since it contains wine and tomatoes, which are both acidic, and requires a bit of cook time. You could also use enameled cast iron (for more tips on choosing the right pot, see Monday's post). This could also be adapted to the crockpot - just brown the beef first and then put everything in the crock pot and cook on Low for 7-8 hours.

Beef Bourguignon Peasant Stew
(Serves 4-6.)

Ingredients:

Beef bourguignon made with ox cheek, served wi...
Beef bourguignon, served with pasta. (Photo credit: Wikipedia)
2 Tbsp cooking oil
2 medium red or golden potatoes, cut into wedges
1 medium onion, cut into wedges
1 lb cubed beef chuck roast
3 Tbsp flour
1/2 tsp dried oregano
1/2 cup Burgundy wine
1 can (14.5 oz) beef broth
1 can (14.5 oz) diced tomatoes
1 can sliced mushrooms, drained
salt and pepper to taste

Directions:
  1. Put the oil in a large pot over medium-high heat, add the potatoes and onion and cook until both veggies have started to brown lightly.
  2. Add the cubed beef and continue to cook until the beef browns, stirring often.
  3. Sprinkle in the flour and oregano; continue cooking and stirring until the beef is coated with the flour and is well browned.
  4. Add the wine and let it come to a boil, stirring to bring up the brown bits from the bottom of the pot.
  5. Add the beef broth and diced tomatoes, stir, and bring to a boil. Continue stirring until the broth thickens slightly.
  6. Turn heat to low, cover the pot, and simmer very gently for 15 minutes, stirring a couple times.
  7. When potatoes and beef are fork tender, add the mushrooms, stir, remove from heat and let sit for 5 minutes.
  8. Taste and season with salt and pepper if needed. 
  9. Serve with pasta or mashed potatoes if desired, or in big bowls with hot crusty bread.
Enhanced by Zemanta

Monday, January 27, 2014

Choosing the Right Pot For Your One-Pot Meals

When you cook meals in one pot, you realize that not every pot is created equal. Your big stainless soup pot and equally big cast iron Dutch oven just don't produce identical results. All sorts of variables come into play. This can be frustrating, especially if you didn't plan on some of the things that can happen.

As they say, forewarned is forearmed. The fact is, different recipes for one pot meals call for different pots. Being informed about this will help you choose the proper pot for the dish. Let's take a look at a few types of pots to see how they would be good, or not so good, to use in certain instances.

Stainless Steel Pots

English: my own picture, to be added to cookwa...
Stainless steel pot (Photo credit: Wikipedia)
You most likely already have a set of pots and pans, with at least one very large pot that you use perhaps, for boiling spaghetti - which is probably stainless steel. One advantage to these pots is they are relatively light in weight (when compared to cast iron), which means you can have a very big pot and still be able to move it around. They can go right into the dishwasher, too.  The lids are usually pretty tight fitting. Stainless steel is a 'nonreactive' material, which means you can cook acidic foods without worrying about pitting or stripping the surface.

These pots, however, are not that great when it comes to conducting heat. Most of the heat will be on the bottom of the pot, with little heat traveling up the sides or being retained there. That means a slow simmering stew may be bubbling on the bottom, but not bubbling on the surface and in the middle. This is a pot that needs watching, and occasional stirring, if you're trying to maintain a slow simmer throughout the contents.

Raw Cast Iron Pot

Often referred to as a Dutch oven, these pots are used for roasting or braising meat, and for making thick stews. The advantage to these pots is they are very durable. The better models heat evenly on the bottom and up the sides and retain the heat well, and when put on low heat, the contents will simmer slowly. A cast iron pot is also naturally non-stick if seasoned and maintained properly. Food cooked in raw cast iron also has an added benefit of absorbing iron, a necessary nutrient.

These pots are, however, very heavy. They are also 'reactive' meaning acidic foods may pit or damage the surface, and boiling food in water in a cast iron pot is not recommended. They take a longer time to heat up and to cool down, which can be either an advantage or a disadvantage, depending on the situation. Very inexpensive models may have 'hot spots' on the bottom. Raw cast iron pots need to be seasoned and re-seasoned routinely to maintain their natural non-stick coating. You cannot put a raw cast iron pot in the dishwasher.

my own photo
Cast iron & enameled cast iron pots. (Photo credit: Wikipedia)
Enameled Cast Iron Pots

One way manufacturers have eliminated the problem of the cast iron pot being 'reactive' is by applying an enamel coating. These pretty pots have all the benefits of cast iron without the problems associated with maintaining the interior and protecting it from acid and other detrimental elements. They are available in a wide range of sizes, shapes, and colors and make a pretty addition to any kitchen.

Now for the down side. They can be very expensive. However, average priced cast iron manufacturers have upped their game and are producing enameled cast iron pots to compete with the more expensive brands. Of course, these pots are very heavy.

Aluminum Pot

This is a lightweight material that also heats up fast and conducts heat well throughout the pot. Aluminum pots are also relatively inexpensive.

The bad news is, aluminum is very reactive to acidic foods, making it susceptible to pitting and discoloration. It is also rather soft and may scratch easily. This causes health concerns if used over time, as too much aluminum is not good for you. To solve this problem, look for anodized aluminum. It is more expensive than raw aluminum, but the benefits are well worth it if you're considering buying aluminum.

Copper Pots

These are pretty pots that conduct heat very well. They are available with stainless steel linings so you can have the shiny copper outside with a non-reactive inside for cooking.

Yes, copper is a reactive cooking surface if not coated with stainless. Any acidic ingredient will actually transfer a metallic taste to the food you are cooking, and in some cases a gray discoloration. But, again, with a stainless interior, a copper pot can be a good choice if you want a pot that heats well, is lighter in weight, and cooks food evenly. Also, copper needs polishing, which may or may not make a difference to you. It's just another thing to keep in mind.

Conclusion

When it comes to choosing a pot to use for your one-pot meals, you have many choices. Read through the advantages and disadvantages for each and decide what's important to you. Think about the dishes you most often make, consider the price, weigh the quality and convenience, and then go out and get the pot you need to start creating those delicious one pot meals - and see our recipes this month for lots of tasty ideas to cook in them!
Enhanced by Zemanta

Friday, January 24, 2014

Recipe: Fresh Tomato & Zucchini Turkey Stew

This healthy recipe works great as a one-pot meal, and includes lots of tasty veggies, plus brown rice and turkey, with flavors of the Southwest. Prepare the rice and chop the veggies ahead of time, and it's extra-easy to throw together a fast, healthy dinner in a jiffy.

Fresh Tomato Zucchini Turkey Stew
(Serves 4-6.)

Ingredients:

1 lb organic ground turkey
1 Tbsp olive oil
1 tsp dried oregano
1/2 tsp cumin
1 small onion, diced
1 garlic clove, minced
1 can (6 oz) tomato sauce
1 tomato sauce can of water
6 small zucchini, rough chopped
6 Roma tomatoes, diced
2 cups cooked brown rice
salt and pepper to taste

Directions:
  • Put a large pot on medium heat, add the turkey and olive oil, breaking the turkey up as it cooks. When turkey is no longer pink, add the oregano, cumin, and onion and cook until onion is just softened, then add the garlic and cook, stirring, 1 minute.
  • Add the tomato sauce to the pot plus the same can filled with water, stir to combine, then add the remaining ingredients, stir to combine, then turn heat to low, cover pot, and simmer gently for 15 to 20 minutes, stirring occasionally. Taste and add more salt and pepper if desired.
  • Serve hot in big bowls.

Enhanced by Zemanta

Wednesday, January 22, 2014

Recipe: Quick & Easy Spaghetti Dinner In A Pot

Check out this one-pot version of an old-fashioned favorite. It's super simple and easy, and the kids will love it! It's nothing fancy, but it's perfect for a quick dinner when you are pressed for time - and with everything in one pot, cleanup will be a snap too. (To fancy it up a bit and add some veggies, add one diced green, red, or yellow bell pepper with other ingredients after the beef is browned.)

Spaghetti And Meat Sauce Dinner In A Pot
 (Serves 4.)

Ingredients:

A pot containing "spaghetti" with to...
 (Photo credit: Wikipedia)
1 lb ground beef
1 Tbsp olive oil
1 tsp dried oregano
2 Tbsp grated onion
1 Tbsp grated garlic clove
1 can (6 oz) tomato paste
1 cup tomato juice
5 cups water
8 oz spaghetti pasta, uncooked
Parmesan cheese (for topping)

Directions:
  • In large pot over medium-high heat, put the oil and ground beef, browning the beef until no pink remains.
  • Add next 6 ingredients, stir to combine, then cover the pot, turn heat to low, and simmer for 10 minutes, stirring occasionally.
  • Add the uncooked spaghetti pasta, stir to combine, cover the pot, and simmer for 15 to 20 minutes or until spaghetti pasta is cooked tender, stirring occasionally.
  • Serve immediately, sprinkled with Parmesan cheese.

Enhanced by Zemanta

Monday, January 20, 2014

One-Pot Meals for Kids

If you have ever tried to cook with kids, you know the prep work can get frustrating. Kids aren't known for their patience, especially when food is involved. Any patience your kids have will fly out the window if dinner isn't on the table fast!

As your child watches you get out cutting boards, knives, colanders, beaters, cookbooks, peelers, whisks, measuring cups and spoons, pots, pans, baking sheets, etc. etc. etc., their eyes will most likely glaze over. Of course, we want our kids to learn to cook, but there has got to be an easier way, for both you and your kids.
The one pot meal is a cooking method made for kids. Having too many procedures can intimidate kids and make them want to skip the process altogether. Cooking should be fun, not frustrating.

Having a few simple one pot meals that a child can help put together is the easiest way to encourage a child to spend time in the kitchen cooking. Here is a list a couple of the easiest meals that kids can put together in one pot with ingredients that are simple to use.

Gourmet Mac-N-Cheese Pot

"Macaroni" and cheese. No macaroni w...
"Macaroni" and cheese. (Photo credit: Wikipedia)
Okay, it's really not gourmet, but your child doesn't need to know that. Start with a basic macaroni and cheese recipe. Get out a pot and prepare the mac and cheese according to the recipe. This is definitely a recipe every kid likes to make, so you're on your way already to a kid-friendly recipe.

After the mac and cheese is done, mix a frozen or canned vegetable into the mac and cheese. Frozen sweet peas work well, as does frozen broccoli. Your child may even like to try mixing in salsa and pinto beans or black beans for a Mexican macaroni and cheese dish. Just be sure your child chooses the ingredients so the dish is his or her own creation. You can stop there and serve, or you can create a cheesier version by adding more shredded cheese, or a creamier creation by adding cream cheese. And you can always stir in some shredded chicken if you want to add more protein and texture.

Ramen PB Crunch Thai Pot

It doesn't get much easier than this. Ramen noodles are turned into a delightfully delicious, and nutritious, meal with the addition of peanut butter (for protein) and veggies. Start simply by making the ramen noodles in a big pot according to package directions. You can use the flavor packets or leave them out. I recommend, however, that if you do use them, use only one.

Once the ramen noodles are done, take a tablespoon or more of good peanut butter and stir it into the hot ramen noodles. Now, here's where your child can choose other ingredients to add. If you keep cans of chop suey vegetables handy, that may be a good one to choose. Bean sprouts and water chestnuts alone would also be nice. Frozen french cut green beans or broccoli or sweet peas are all good choices. The more you let your child choose, the more likely it is that the meal will be eaten, and enjoyed.

Quinoa with Bacon and Vegetables
Quinoa with Bacon and Vegetables (Photo credit: fritish)
Fluffy Veggie Pot

Instead of serving your child a vegetable or salad, which may very likely be pushed around the plate and not eaten, have your child cook up a full meal deal with veggies buried in fluffy stuff. For this dish you can choose either rice or quinoa for the 'fluff' portion of the meal. Start by cooking a pot of rice or quinoa according to directions on the box.

While the rice or quinoa is cooking, have your child choose the veggies for the pot.  Any assortment works just as long as your child gets to choose. When the quinoa or rice is done cooking, fluff it up with a fork, then toss in the veggies. It's that simple. Add seasoning to taste. If your child likes Mexican food, they might want to sprinkle in some taco seasoning and perhaps add pinto beans, corn, and some chopped tomatoes. The idea is to let your child have fun fluffing up the ingredients in the pot and then sitting down to a scrumptious bowl of healthy goodness.

We know that when we get kids involved in preparing and cooking their own meals they eat better. Try these simple one pot meals with your kids and they could start branching out on their own, looking for even more ways to create delicious meals for themselves, or maybe the whole family!

Enhanced by Zemanta

Friday, January 17, 2014

Recipe: Beer-Braised Beef Roast Dinner

This tasty one-pot recipe has lots of healthy veggies and hearty, rich flavors! This is a great one for preparing the ingredients ahead of time to save time when cooking. Just dice the meat and chop all the veggies and store in the refrigerator until ready to cook. It will make this delicious one-pot meal a snap to prepare - and it's also easy to adapt to the crockpot.

Beer-Braised Beef Roast Dinner In A Pot
(Serves 6-8.)

Ingredients:

English: Beef top round with parsnips, carrots...
Beef roast w/veggies. (Photo credit: Wikipedia)
3 lb organic or grass-fed beef roast (chuck, blade, shoulder)
1 tsp salt
1/4 tsp black pepper
2 Tbsp cooking oil, divided
2 medium size onions, cut into thin wedges
2 medium red or yellow potatoes, cut into thin wedges
2 medium carrots, cut into long chunks
2 cups fresh green beans, stems removed
2 garlic cloves, minced
1/4 cup flour
1 cup beer
1 cup tomato juice
1 tsp dried crushed thyme

Directions:
  • Season beef all over with salt and pepper.
  • Get out a big heavy pot, add 1 tablespoon of the oil in, put pot over medium-high heat. When the oil is hot, put the beef roast in and let brown completely on first side, then flip and let the second side brown completely. Don't flip it over and over again. Remove beef roast from pot to a plate and set aside.
  • Put the other 1 tablespoon of oil in the pot and let it heat, then add in the onion, potatoes, carrots, and beans; cook, stirring, until veggies start to soften, then add the garlic and cook for 1 minute, stirring constantly.
  • Sprinkle the flour in the pot and stir until the flour turns light yellow in color.
  • Add the beer, tomato juice, and thyme, stir to combine and let come to a boil, then reduce heat to low.
  • Set roast back into pot on top of veggies, cover, and simmer slowly on low heat for 2 to 3 hours or until beef roast falls apart when pierced with a fork. (You could also do this step in a crock pot - just put all ingredients in crockpot and cook on Low for about 6 hours.)
  • Serve beef with all the veggies alongside. 

More Tasty & Easy One-Pot Recipes:
   
Enhanced by Zemanta

Wednesday, January 15, 2014

Recipe: Arroz Con Pollo In A Pot

This classic Spanish recipe works great as a one-pot meal! To make it even simpler, prepare the chicken (clean and skin), and dice the vegetables ahead of time. Try adding 1/2 tsp crushed red pepper flakes if you like it spicy, or add a fresh, chopped jalepeno with the other ingredients - or use a can of tomatoes & green chilies in place of the plain tomatoes.

Arroz Con Pollo
(Serves 4-6.)

Ingredients:

Arroz con Pollo (spanisch für „Reis mit Huhn“)
Arroz con Pollo. (Photo credit: Wikipedia)
6 pieces naturally raised chicken, bones and skin removed
salt and pepper to taste
2 Tbsp cooking oil
1 1/2 cups long grain rice
1 small onion, diced
2 garlic cloves, minced
3 cups water
1 can (14 oz) diced tomatoes, undrained
1 tsp kosher salt
1/4 tsp black pepper
1 cup frozen peas

Directions:
  1. Season the chicken pieces with salt and pepper to taste. 
  2. Get out a large Dutch oven or other large pot, put over medium-high heat, add oil, and when the oil is hot add the chicken pieces (don't crowd pot) and brown on both sides, removing the chicken as it's finished cooking; continue browning chicken until it's all done, removing all to a plate.
  3. Now that the pot is empty, add the rice, onion, and garlic; cook, stirring until rice has browned slightly.
  4. Add the water, diced tomatoes, salt, and pepper, stirring to combine. Bring to a boil, turn heat to low.
  5. Lay the cooked chicken on top of this mixture, cover the pot, and simmer slowly for 35 to 40 minutes, until the chicken is tender and no pink remains.
  6. Add the peas to the pot, around the chicken, and push them into the rice. Cover pot, and remove from heat; let sit for 5 minutes before serving.
Enhanced by Zemanta

Monday, January 13, 2014

The Trick to Successful One Pot Meals: Preparation

When you're looking for ways to save time in the kitchen, making a whole meal in one pot has to top the list.  You just have to grab a big pot, grab your ingredients, and go, right? But wait. This is where the idea and the implementation collide.

You've got your pot sitting on the stove, alright, but then you're looking at a pile of ingredients that seem to have taken over the kitchen. Suddenly, you realize that your one pot meal is going to be a lot more work than you planned.

There's the chicken that needs to be cut up and the vegetables that need to be cleaned, peeled, and chopped. The recipe calls for cooked rice and there sits the box of rice, uncooked. You think about searching for another one pot recipe, but by the time you interrupt what you're doing to dig through recipes, you are going to find yourself frustrated as the clock ticks away, resulting in yet another call to the pizza delivery place.

How do we stop this madness? It's really not with magic at all; it's all about planning and preparation. Here are a few simple ways to plan ahead so your easy one pot meals actually end up being as easy as they should be.

Protein

Cooked chicken torn into strips in preparation...
Cooked chicken torn into strips in preparation for a dish. (Photo credit: Wikipedia)
No matter what protein you're using in your one pot meal, get the basic preparation done well before hauling out the pot. If the recipe calls for boneless, skinless chicken, get the bones and skin pulled off the chicken as soon as you bring it home from the grocery store. If the recipe calls for cubed chicken or beef, cut it up ahead of time. Another tip to remember is slightly frozen meat cuts up easier than fresh meat. Put the chicken or meat in the freezer for a half hour and then cube it if you wish. You may want to freeze it after you cut it up to keep it fresher longer. Another bonus is that frozen cubed meat thaws faster than frozen whole meat.
If you really want to speed up your protein prep work, check the recipe to see if it calls for browning the chicken, beef, or ground meat. You may wish to do this step beforehand and store the cooled meat in the refrigerator or freezer to be used when you're ready to put the meal together. In this case, remember, the pan drippings (the brown bits on the bottom of the pot) may be a part of the flavor element for the recipe, so keep this in mind. But, if speed is most important, this step may be the best choice.

Beans are another protein we use a lot in one pot meals. As simple as it sounds, if you use canned beans, open the cans you're going to use that week, drain and rinse them, and store the beans in containers in the refrigerator. Now when you're mixing your one pot meal together, you just open and dump out the beans, removing the need to even grab the colander during your mealtime preparations.

Produce

One of the most time consuming parts of preparation for any meal, whether it's a one pot meal or not, is getting the vegetables cleaned and cut up. In restaurants, the chefs can concentrate on getting the dish cooked to perfection because all the ingredients are sitting there nicely prepared and waiting. Most of us don't have the luxury of having a sous chef busy in our kitchen working to make our life easier! So, we have to plan ahead.

The best way to make sure we can put our meals together quickly is to have all the produce prepared ahead of time. And, the best way to do that is to do the prep work when we bring home the produce - or pick it from the garden! If you wait until dinnertime, chances are time will get short and you'll find yourself chopping celery when you should already have it in the pot.

Take a look at the recipes you plan to make this week. Do the dishes call for things like onions, celery, green pepper, spinach, carrots, parsley, lemon juice and zest, or other produce? Get ahead of the game by washing, peeling, slicing, dicing, squeezing, or otherwise preparing these fresh ingredients. Then, when a recipe calls for a diced onion, you can reach for a Tupperware container of diced onion and throw it in. No cutting boards, no knives, and no clean up to worry about. Planning ahead is the key.

Pasta, Etc.

Many one pot recipes call for some sort of grain or seed ingredient, whether it's pasta, rice, quinoa, bread, or another fiber. Even these food items can be included in your preparation planning. If the recipe calls for cooked rice or quinoa, for instance, you can stock your refrigerator or freezer with plenty so you are ready to grab it and go.

Cover of "One-Pot Meals (Great Taste, Low...
Cover of One-Pot Meals (Great Taste, Low Fat)
If the recipe calls for raw pasta to be added in the pot with the other ingredients, this makes it easy. But if it needs to be cooked first, you can make the pasta ahead of time according to package directions, but be sure to leave it slightly under-cooked so your don't end up with mushy pasta after it cooks in the dish. Put the drained, cooled cooked pasta in a food storage container and drizzle olive oil over it to prevent it from sticking to itself, then keep it in the refrigerator. You can even use cooked pasta in a recipe that calls for uncooked pasta - just reduce the liquid in the recipe and throw the cooked pasta in during the last minutes of cooking time, just enough to heat it up.

Some favorite one pot meals call for dumplings or biscuits dropped on top. It is easy to whip together a simple dumpling or biscuit dough, but do it in advance. Divide the dough into pieces the size you need for your recipe and wrap them up in plastic and put them in the freezer. They will keep for quite some time and be ready to grab to plop on top of your delicious soup or stew when you need them.

Putting meals together quick and easy calls for more than a simple recipe; you need to know how to work smarter in the kitchen. Planning and preparation go a long way to getting meals on the table in a hurry. Use your time wisely to make cooking from scratch more simple, efficient, and delicious!

Enhanced by Zemanta

Friday, January 10, 2014

Crockpot Recipe: Sweet Curried Lamb

This delicious meal utilizes the ease of crockpot cooking to make a complex and flavorful dish very simple to prepare. Rich lamb pairs well with the sweetness of apples and raisins, kicked up into something special with curry and spices. Put this in the crockpot in the morning, and enjoy this ethnic dish at the end of a long day, without having to spend hours standing over the stove. Just steam some rice and you're ready to eat!

Sweet Curried Lamb
(Serves 6-8.)

Ingredients:

Lamb curry
Lamb curry (Photo credit: pelican)
2 lbs lamb meat, cubed
2 medium onions , diced
1 Granny Smith apple, cored and diced
3 Tbsp golden raisins
1/2 cup chopped nuts, any mix you like
1 1/2 cups apple juice
1 lemon, juiced and zested
2 Tbsp curry powder
1 Tbsp brown sugar, packed
1/8 tsp Tabasco sauce
1 garlic clove, minced

Directions:
  • Put onion, apple, raisins, nuts, and lamb in crockpot, in that order.
  • In a separate bowl, put the remaining ingredients, whisk, then pour evenly over the ingredients in crockpot.
  • Cover and cook at LOW for 8 to 9 hours. Stir once half way through cooking.
  • Serve over hot cooked rice.
Enhanced by Zemanta

Wednesday, January 8, 2014

Recipe: One-Pot Meal: Turkey Black Bean Chili

This tasty recipe is simple to cook and clean up after - it only takes one pot! It's full of healthy fiber and hearty flavors, and makes a great meal to fight off the winter chill.

Turkey Black Bean Chili
(Serves 4-6.)

Ingredients:

Turkey, Beef and Black Bean Chili
(Photo credit: dejahthoris)
1 1/4 lb ground turkey (organic is best)
1 Tbsp olive oil
1 large onion, diced
1 green bell pepper, diced
1 garlic clove, minced
1 cup whole kernel corn, canned or frozen
1 can (15 oz) black beans, rinsed and drained well
1 (28 oz) can crushed tomatoes
1 (8 oz) can tomato sauce
1 Tbsp chili powder or chili seasoning mix (more or less to taste)
salt and pepper to taste

Directions:
  1. In a big pot over medium heat, put ground turkey and olive oil. Cook, breaking up the turkey, until the turkey is no longer pink.
  2. Add the onion and green pepper and continue cooking until the both are softened, then add the garlic and cook for 1 minute more, stirring steadily.
  3. Add remaining ingredients to pot, stir to combine, then slightly cover pot, turn heat down to low, and simmer slowly for 20 to 30 minutes or until flavors combine.
  4. Serve hot out of the pot.

Enhanced by Zemanta

Monday, January 6, 2014

Tips for Cooking One-Pot Meals - Dutch Oven vs. Crock Pot

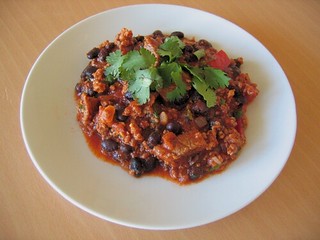
Since man first set fire to a piece of wood, cooking has been evolving in all directions. We sear, fry, grill, smoke, bake, braise, boil, steam, and simmer. Preferred cooking methods have changed often through time. Not surprisingly, we have developed some favorite cooking methods to get the most flavor out of certain foods, as well as to save time and money.

The crock pot, which was very popular in the 1970s, has enjoyed a rediscovery of sorts. The convenience, energy savings, and time savings of the crock pot has attracted a whole new fan.  The 'set it and forget it' group is back! And, with the new and improved crock pot designs, efficiency and ease of use is a big seller.

my own photo
Dutch ovens. (Photo credit: Wikipedia)
At the same time, the Dutch oven has had a rebirth, as well. Beautifully designed enameled models are becoming more and more popular in today's kitchen. We also have the dedicated cast iron fan who has loved their favorite Dutch oven for decades. With both styles - the traditional 'campfire' style cast iron Dutch oven and the colorful enamel Dutch oven - we have plenty of options to enjoy.

So, how do we decide which method is best for making one pot meals? Let's take a look at a few reasons you might choose one or the other, or both.

Heat

Browning meat before adding it to a dish is usually a good idea. This method adds not only color and flavor, but sears the meat to seal the juices. It also provides those nice 'browned bits' on the bottom of the pot that recipes often call for deglazing with a liquid. This flavor cannot be ignored.

A crock pot is not designed to get hot enough on the bottom to sear protein. You won't get 'browned bits' and you won't be able to create a roux with flour and butter effectively in a crock pot.

You will also not be able to saute onion, celery, or garlic before adding the remaining ingredients in a crock pot. Again, the temperature on the bottom of the crock pot simply will not work well. You can try to turn the crock pot to high and add the ingredients, but the results will not be the same as cooking on a stovetop.

To solve this, you can brown the meat and saute the vegetables in a separate skillet over high heat, then add the ingredients to the crock pot. You could then deglaze the skillet to get up the 'browned bits' and add them to the crock pot. This works, but it does require more steps and more clean up.

The Dutch oven wins this argument. Browning and sauteing, when desired, is best done in the same Dutch oven you are using for your meal preparation, both for flavor and for clean up.

Ease

You can't argue the fact that putting ingredients in the crock pot, setting it and forgetting it, has its advantages. If your home life is chaotic after school and after work, walking into the house and having a crock pot meal all ready to eat is a plus.

Recipes for crock pot meals that take eight, nine, or ten hours are never difficult to find, meaning even if you are away from home for that long, you can still come home to a delicious meal in the crock pot.

Meals can even be prepared the night before, with veggies, meat, and liquid all layered in the crock pot insert and put in the refrigerator. Then, in the morning, just put the insert in, plug it in, and turn the heat to low.

Some crock pots have more sophisticated timers that you can set to turn on when you want and even lower the temperature to keep it warm until you get home.

The crock pot wins this argument. Nothing beats the ease of having everything together and just setting a timer to start when you leave, and be ready when you get home. If you don't do any browning in a separate pan, clean up is easy, too.

Simmering

When you put a Dutch oven on top of a burner on low, you have one disadvantage over a crock pot; the heat source is direct. You will have to check and stir the contents often. If the burner is set low enough to keep the contents from sticking or burning on the bottom, you may not get enough heat to keep the rest of the contents simmering.

English: Slow Coooker/ Crock pot's parts This ...
The major parts of a crock-pot, namely the heating component, the ceramic pot and a glass lid. (Photo credit: Wikipedia)
It's true that the crock pot is surrounded by heat, allowing the contents to simmer more evenly.  But, not all crock pots have a lot of temperature control, which could mean the contents are simmering too fast even on the low setting.  If your crock pot has only a high and low setting, there isn't much you can do to slow the simmer down if it's already set on low.

Of course, many of the newer, heavier Dutch ovens are made so well that the heat is distributed evenly around the entire bottom and up the sides. And, many crock pots now come with a wide range of temperature settings to help maintain a slow simmer.

There is a lot to consider here. Basically, neither the Dutch oven nor the crock pot is the clear winner in this argument.  The Dutch oven must be watched and adjusted, while the crock pot has a more even simmer, but it could be too fast with no adjustment available. This is strictly a personal preference, and depends on the equipment you have and the meals you are making.

Conclusion

The simple fact is, there are pros and cons to both the Dutch oven and the crock pot. Searing and browning is important for many dishes, so you may want to cook in a Dutch oven to keep everything in one pot. Or, your lifestyle may require meals ready the moment you walk in the door, which would best be served with a crock pot for easiest preparation and clean up.

In my opinion, you need both. If the cost and storage space works, invest in a good Dutch oven and a good crock pot that will meet your family's needs.  Having both pieces of equipment in your kitchen will open up a whole world of perfectly prepared delicious one-pot meals!

And be sure to check back here throughout this month for some simple and tasty one-pot recipes!

   
Enhanced by Zemanta

Friday, January 3, 2014

Recipe: Quick & Simple Thai Noodles

If you're looking for a hearty snack, a fast vegetarian lunch, or a quick light dinner with an Asian flair, this easy recipe hits the spot. You may have most of the ingredients already on hand, and it only takes a few minutes to put this exotic tasting dish together. If you want peanuts in it, but don't have any handy, try using crunchy peanut butter instead of the smooth kind.


Quick & Simple Thai Noodles
(Serves 2.)

Ingredients:

4 cups water
2 (3 oz) packages ramen noodles (without seasoning packets)
2 cups bagged coleslaw mix, or shredded cabbage
3 Tbsp peanut butter
4 tsp freshly squeezed lime juice
1 Tbsp chili sauce (or to taste)
peanuts, optional

Directions:
  1.  Put water in a large saucepan and bring it to a boil.
  2. Remove saucepan from the heat, add the ramen noodles, stir to break up, cover saucepan and set aside for 2 minutes.
  3. Drain the ramen noodles into a colander placed in a bowl, reserving the liquid.  
  4. Dump the drained ramen noodles into a big bowl and add 1/2 cup of the reserved liquid.
  5. Add the remaining ingredients to the bowl with the ramen noodles and toss well until the peanut butter melts.
  6. Taste and season with salt and pepper if needed. Sprinkle with chopped peanuts if desired. Serve warm.

Enhanced by Zemanta

Wednesday, January 1, 2014

Recipe: Simple Healthy Hummus

Happy New Year!

After all the holiday feasts, sometimes it's nice to have a simple New Year's meal without too much fuss. Or maybe you don't really feel like eating much at all - maybe just the perfect snack is all you're looking for. Something like hummus is just right in this case - tasty, filling but not heavy, and full of fresh flavors and healthy fiber. Try this easy home-made version for a snack or light lunch today - just pair it with raw vegetables, pita chips, or whole-grain bread, and take a break from all the holiday excess!

Simple Healthy Hummus
(Makes about 2 cups.)

Ingredients:

hummus-plate
hummus-plate (Photo credit: serenejournal)
1 (15 oz size) can garbanzo beans, drained and rinsed
1 Tbsp tahini
2 Tbsp lemon juice
2 garlic cloves, minced
1/4 tsp salt
pinch cayenne pepper
1/4 cup water (more or less depending on texture you want)
1 Tbsp olive oil (more or less depending on texture you want)
1/4 cup chopped flat-leaf parsley

Directions:
  • In your food processor, combine the garbanzo beans, tahini, lemon juice, garlic, salt, and cayenne. Turn on and pulse until mixture is fairly smooth.
  • Start processor running steady and slowly pour in the water, stopping motor to test the texture, then adding more water if you like.
  • Again, with motor running, slowly pour in the olive oil, adding more if you like.
  • Stop processor, taste and adjust seasonings, pulse and repeat taste testing until you have it the way you like it.
  • Add the parsley and pulse a few times.
  • Spoon out into a bowl and serve immediately, or cover and refrigerate. (If you refrigerate, let the hummus sit out at room temperature a few minutes before serving - it tastes better when it's not too chilled.)
  • Can be served as a dip, spread, or just eaten with a spoon!

Enhanced by Zemanta