Over the past month, you have mastered the basics of your grill and now you are ready to start showing off your skills a bit more - just in time to serve perfect steak at your 4th of July barbecue this week! What better vehicle to grill with bravado than the classic – grilled steak. There are three simple things to do to acquire restaurant quality perfection when it comes to grilling a nice beef steak. Let's get started. My mouth is watering already!
1. Learn to Turn for Perfect Grill Marks
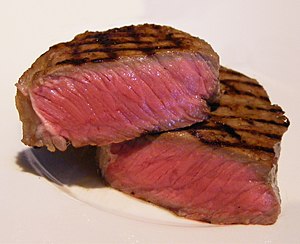
Have you ever envied those amazing sear marks you see on steak in restaurants? Be honest. You wish you could duplicate that at home. Well, it is a lot easier than you think. All you need is a hot grill, a pair of tongs, and at least a little knowledge of geometry. Yes, geometry.
| (Photo credit: Wikipedia) |
You can also imagine making the letter 'V' with where it was laying and where it is going to lay. Also, be sure that the grates are hot where you are moving it too – if they are not hot, your grill marks will not be as prominent. Now your steak will look like it came from a five star restaurant.
Once you have the grill marks set on the top of the steak, you can flip your steak and you can continue cooking the steak until it's done to your liking. That's the bottom side and no one will see it, so it's not necessary to score it... unless you're absolutely hooked on this bit of fun.
2. Pick Up Steaks and Move
Now your presentation side is done and you just have to finish cooking the rest of the meal. This is where a giant grilling myth is busted. Many people think once you set your food on the grill, you are not supposed to pick it up, move it or even look at it until the suggested time is up.
Moving your steak, or other food, around on the grill helps ensure you get even cooking and can even help regulate internal temperature and doneness.
For instance, say you have a steak that you want to prepare to medium well. You have created your grill marks and flipped it over. The bottom is starting to look done, but it is still only medium in the middle. Instead of keeping the steak where it is, chancing that the bottom will get burnt so the middle is medium, why not move it to a cooler part of the grill and close the lid. This slows down the cooking of the outside of the steak while acting like an oven to cook the rest to its desired doneness.
3. A Good Steak is Pretty in Pink
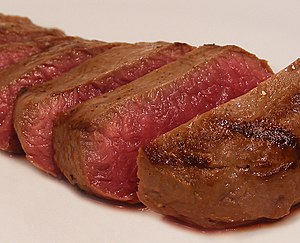
While the USDA and other organizations still warn against undercooked meat, there are plenty of meat-loving grilling maestros who really don't see the reasoning. A good cut of meat that has been grilled until it resembles charcoal is an abomination to the whole experience. Steak will get tough as it gets closer to well-done simply because it's drying out.
| (Photo credit: Wikipedia) |
You have to take into account that the steak continues to cook after you remove it from the grill. It's not a lot, but it is enough to go from done to well-done if you're not careful. For this reason, always take your steak off when you are thinking “Just one more minute.”
Remove your steak with tongs not a fork. Poking holes in the steak will let the juices run out. And please do not slice into the meat to see if it's done! This is a major no-no. Instead, use the hand test. With your hand open, feel the flesh under your thumb. That's how a rare steak feels. Close your hand; that's how a steak cooked medium feels. Clench your hand tight; that's how a well-done steak feels.
Remove your steak before it has the 'clenched hand flesh' feeling. Set your steak on a warm plate or cutting board and allow it to rest for 3 to 5 minutes while you dish up the rest of the meal. Then and only then cut into the meat.
Another reason for leaving your steak a bit pink inside is for leftovers. If you're like me, you are thrilled to see that little piece of steak in foil the next day in the fridge. Now you can pull it out, slice it thin, and use it in a fajita or an omelet or other great dish. But, if the steak is overcooked already, it will just get tough as you cook it more. In tomorrow's breakfast or lunch, your medium-rare to medium steak will lose its pink, but not its flavor if you're careful and don't over-heat it. Remember this simple rule, you can always cook food more, but you can never cook it any less. So keep that steak at least a little pink inside.
By keeping these three tips in mind, you will create a perfectly grilled steak that will amaze your family and friends. You'll wonder why you ever wasted your money ordering steak at a restaurant. And maybe you never will again!
Be sure to check back in the next couple of days for some tasty steak recipes for your 4th of July barbecue, as well as the rest of the grilling days of summer.


No comments:
Post a Comment
We welcome comments and suggestions!