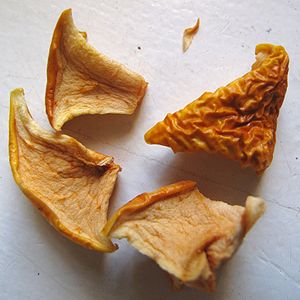
 Image via WikipediaDried fruits can serve as a healthy alternative to candy. Instead of reaching for chocolate or a piece of hard candy, the kids will reach for a dried pineapple or apple slices. The sweetness of the fruit is concentrated when it is dried and bursts forth with every bite.
Learning to dry fruit is a fairly easy process. You don’t need to buy any fancy equipment. Investing in a few sealing jars would be nice so that storing the fruit will be easier, but it isn’t a necessity. Sealing jars can be found fairly inexpensively at many supermarkets.
To start, gather all of the fruits you want to dry. Most fruits make good choices. Some of the more common ones are: pineapples, apples, plums, grapes, apricots, and tomatoes (yes they are a fruit!). If you favor lemons, limes, or other citrus fruits, you will be drying the peels and not the fruit itself.
All fruit and equipment need to be clean and thoroughly dried before beginning. Drying racks are needed if you plan on air drying outside or using an oven. Some pieces may be done before others so rotating the trays in the oven gives you a chance to remove any fruit that is already dried and replace with another.
Slice the fruit into small pieces. Apples need to be cored and peeled before slicing. Tomatoes can be cut into slices or quarters and salted before drying. Grapes and plums are okay as is because the skin doesn’t affect their taste.
 Image via WikipediaIf you prefer to use the microwave to dry your fruit, place small batches in the microwave on the turntable tray. Fruit pieces should be evenly spaced to allow for air circulation while drying. Set the microwave to the defrost setting in order to dry the fruit. It will take about thirty to forty-five minutes. Check after thirty minutes and gradually add time as needed. It is not recommended that tomatoes be dried via the microwave because they should be dried at approximately 120 degrees for about twenty-four hours.
 You can eat some of these tasty treats as soon as they are dried or you can save some for later. If storing for later, let the fruit cool before placing in sealing jars or zipped plastic bags. Dried fruits will keep two weeks or longer in a cool dark place (longer if refrigerated). However, these fruit treats are so scrumptious they may not even last for that long.
 Image via WikipediaDried fruit has a multitude of uses. It can be eaten as is or as a flavorful addition to ice cream, salads, pizzas, and more. Drying your fruits can save you money because it makes the fruit last longer than normal, and avoids spoilage, so you can have it on hand for longer.
Note: If you don't want to dry it in the oven, or you plan to be drying a lot of fruit on an ongoing basis, you may wish to invest in a dehydrator. They aren't terribly expensive, and you can find them fairly easily nowadays. A couple of examples are shown below.
Dehydrators for Fruits & Vegetables

No comments:
Post a Comment
We welcome comments and suggestions!