Wednesday, September 30, 2015

Recipe: Easy Basic Pizza Dough

My husband and I made pizza for the first time this weekend, using a dough recipe very similar to this one. Stretching the dough into a crust was a little tricky, but for the most part this was very easy! I made the dough in the morning and let it rise for several hours, then put it in the fridge until it was time to make the crust. I will try to roll it thinner next time, as it rose quite a bit while baking, but overall it was quite good!  We made it Margherita-style, with fresh tomatoes, basil, and mozzarella cheese.

This will make enough for about 3 medium-sized pizzas, but you can easily freeze the leftover dough for later.

Try this this simple and versatile recipe for pizza, pepperoni rolls or breadsticks for dipping!

Easy Basic Pizza Dough
(Makes about 3 12" crusts.)

Ingredients:

2 1/4 teaspoons active dry yeast
3/4 teaspoons brown sugar or honey
1 1/2 cups slightly warm water (110˚F)
1 teaspoon salt
2 tablespoons olive oil
3 1/2 cups all-purpose flour

Directions:
  • Add warm water, then yeast and brown sugar or honey to large bowl. Let sit for 10 - 12 minutes.
  • Add salt and oil to the bowl, then slowly mix in 2 1/2 cups of flour while stirring constantly with a fork. 
  • Empty dough onto a well-floured surface and knead in more flour until it no longer sticks to your hands. 
  • Shape dough into a ball and add to a clean bowl sprayed with non-stick cooking spray. Cover bowl with a towel and let sit for approximately one hour in a warm place. 
  • While the dough is rising, preheat the oven to 425˚.
  • Once the dough has doubled in size, punch it down with your first and reshape into a ball. 
  • After a couple of minutes, roll the dough out on a clean, well-floured surface, Place rolled out dough on a pizza pan or stone and brush edges with olive oil. 
  • Top dough with your favorite pizza toppings and bake for 15 to 20 minutes or until cheese and crust are a nice golden brown. 

Monday, September 28, 2015

Recipe: Smoky Hot Vinaigrette Wilted Spinach Salad

This time of year is my absolute favorite when it comes to cooking! In most parts of the country, you can still find tons of goodies in the garden or at the farmer's market, and it's cool enough to cook some nice, hearty fall meals.

This week, we're focusing on fall - whether it's a hot spinach salad, pizza with fresh-from-the-garden toppings, or tasty chicken chili - hit up the farmer's market, as we've got your fall menu for the week right here!

Smoky Hot Vinaigrette Wilted Spinach Salad
(Serves 4-6.)

Ingredients:

12 ounces fresh spinach
1/2 cup thinly sliced shallot
1/3 cup red wine vinegar
2 Tbsp extra-virgin olive oil
2 Tbsp sliced almonds
1/4 tsp smoked paprika
1/3 cup chicken broth or vegetable broth
1/4 cup chopped black olives
optional: crisp bacon and chopped hard-cooked eggs

Directions:
  • Rinse spinach and thoroughly dry it, then place in a large heat-resistant salad bowl.
  • In a large skillet over medium heat, put the shallots, red wine vinegar, and oil and cook, stirring, until the liquid in the skillet is reduced down by a little more than half.
  • Then add in the almonds and paprika, stir and cook about 1 minute.
  • Stir in the broth and olives and bring to a simmer, and cook for about 1 minute until totally hot and flavors combined. 
  • Remove from heat and immediately pour the dressing out of the skillet over the spinach and toss quickly until spinach is slightly wilted.
  • Serve immediately.
  • If desired, sprinkle crisp bacon and chopped hard-cooked eggs over salad.

Friday, September 25, 2015

Recipe: Eggplant Oven Fries

Here's another delicious and healthy late-summer veggie recipe to add to your list of "how-to-use-up-all-these-veggies recipes."

If you love fried zucchini sticks, you've got to try this "fried" eggplant recipe! The best part is, they're not even fried at all - they're baked! These crispy "fries" include a great herb mixture that is sure to satisfy, and they're great served with marinara sauce or a spicy mayo.

Eggplant Oven Fries

Ingredients: 

1 medium eggplant
2 eggs
1 1/4 cups breadcrumbs
1 cup grated Parmesan
1 teaspoon oregano
1 teaspoon basil
Coarse salt and pepper

Directions:
  • Put your rack near the top of your oven and make sure there is space for your baking sheet and eggplant. Set the oven to the broil setting. 
  • Cut your eggplant into wedges, making them fairly thin, so the eggplant will soften when you broil it. Set aside. 
  • Whisk the eggs in a shallow bowl or baking dish. Set aside. 
  • Combine the breadcrumbs, Parmesan, oregano, basil, salt and pepper in a shallow bowl or baking dish. Set aside. 
  • One by one, dip your eggplant wedges into the egg mixture and then the breadcrumb mixture, ensuring they are completely coated. 
  • Place each wedge on a greased baking dish as you complete them. 
  • Broil for 3 minutes per side. 
  • They’re done when they’re golden brown. 

Wednesday, September 23, 2015

Recipe: Quick & Easy Baba Ghanoush

Baba Ganouj is an amazingly tasty and healthy dip. It is so creamy, yet it contains no dairy or dairy substitutes whatsoever.

Great with pita bread, veggies and more, this is usually a more involved dish which requires slow-roasting a whole eggplant, but in this quick, easy, version, you can be ready to eat in just a few minutes!

Quick & Easy Baba Ghanoush

Prep Time: 10 min.
Cook Time:  15 min.

Ingredients: 

1 eggplant
2 cloves garlic
2 teaspoons dried parsley
1/4 cup tahini
2 tablespoons lemon juice
1 tablespoon olive oil

Directions:
  • Preheat your oven to 400 F. 
  • Cut the eggplant into 2 inch chunks, wrap them in foil and bake in the oven for approximately 15 minutes, or until the flesh is soft. Remove from oven and let cool. 
  • Remove the skin from the cooled eggplant and place flesh in a blender. 
  • Add the garlic, parsley, tahini, lemon juice and olive oil. Blend until smooth. 
  • Serve with carrots, celery, peppers, or other dipping veggies, or pita chips or pita wedges.
  • The dip tastes great right away, but letting the flavors blend in the refrigerator for a couple hours will make it even better!

Monday, September 21, 2015

Recipe: Oven-Baked Summer Squash Fries

While the main crop of summer squash may be done, we're still getting a fair amount each week from the garden, and after eating lots of it for the past couple of months, we're looking for new ways to prepare it.

This tasty recipe is much healthier than fried squash, but still has that delightful crunchy crust! Try this one when you're looking for a new, healthy way to use up some of that extra summer squash or zucchini.

Oven-Baked Summer Squash Fries

Ingredients: 

1 medium summer squash
2 eggs
1 ½ cups breadcrumbs (try panko breadcrumbs for a crunchier texture)
1 teaspoon paprika
1 teaspoon mustard power
Salt and pepper
Olive oil

Directions:
  • Preheat oven to 400 F. Grease a large baking sheet with olive oil and set aside. 
  • Cut your summer squash into wedges or wide strips. Remove the seeds if they are quite large and set wedges aside. 
  • Whisk the eggs in a dish and set aside. 
  • In another dish, combine the bread crumbs, paprika, mustard powder and salt and pepper. 
  • Start by dipping the wedges, one by one, into the egg mixture and then the bread crumb mixture. 
  • Place each wedge on the greased baking sheet. Continue until all the wedges are done. 
  • You can bake the wedges as is for about 30-40 (until soft inside and golden brown on the outside) as is, but if you want a more golden color, drizzle or spray some olive oil on top of the wedges. 
  • Flip half way through baking. 
  •  Serve with ranch or another favorite dip.


Friday, September 18, 2015

Recipe: Beef & Broccoli Stir Fry With Orange Sauce

Broccoli lends itself very well to stir fry dishes, with it's fresh green color and crunch, and the fact that its health benefits are most potent when it is not cooked for long periods of time. The light citrusy sauce gives this a nice Asian flavor, and it's very quick to throw together!

Try this classic beef & broccoli stir fry dish and add a fresh green salad for a quick, tasty, and healthy dinner packed with flavor and nutrients.

Beef & Broccoli Stir-Fry With Orange Sauce

Ingredients:

1 cup long grain white rice
1/4 cup orange juice
1 Tbsp. rice vinegar
1 Tbsp. soy sauce
1 Tbsp. light brown sugar
1 pound top round steak, cut into strips
1 Tbsp. cornstarch
salt and black pepper to taste
1 pound broccoli, florettes broken into small pieces
2 Tbsp. peanut oil, divided
1 red bell pepper, cut into very thin strips

Directions:
  • Cook the rice using directions on box; set aside.
  • In a bowl, whisk together the orange juice, vinegar, soy sauce, and brown sugar; set aside.
  • In a large bowl, toss the beef with the cornstarch, season with salt and pepper; set aside. 
  • In a wok or large skillet over high heat, put broccoli pieces with 1 cup of water, sprinkle in a little salt. Bring to a boil, then turn heat down to medium-high and cook until broccoli is just crisp-tender (about 2 minutes). Remove broccoli to a plate, pour out and discard any remaining water in the wok, wiping to dry with a paper towel. 
  • Put wok over high heat, add 1 tablespoon oil and heat until sizzling hot. 
  • Add half of the beef and cook, stirring, until browned; remove the beef using a slotted spoon, and put on plate with the broccoli.
  • Put remaining oil in wok, add remaining uncooked beef, stir and cook until browned.
  • Now add back into the wok the beef and broccoli that was set aside, then pour in the orange juice mixture and the cut bell pepper. Stir gently to combine, then allow to cook on high heat for a couple minutes until the sauce thickens. 
  • Serve over rice.


Wednesday, September 16, 2015

Recipe: Piccolini Mediterranean Broccoli Salad

Here's a great way to incorporate more of that superfood - broccoli - into your diet! This tasty pasta salad recipe is made with the fresh flavors of Italy - olives, lemon, garlic, and oregano. Capers add an extra bite to the zesty dressing, while fresh, lightly cooked broccoli adds an extra boost to your health. Makes a great lunch, side dish, or potluck addition.

This one will definitely be a repeat in your recipe book!

Piccolini Mediterranean Broccoli Salad

Ingredients:

Image Source: Whole Foods Market
1 lb. piccolini (tiny penne) pasta (or other small pasta like mini shells)
1 bunch fresh broccoli florets, broken into small pieces
2/3 cup Greek olives, pitted and sliced
1/4 cup capers, drained
3/4 cup olive oil
3/4 cup lemon juice
2 garlic cloves, minced or grated
1 tsp dried oregano

Directions:
  • Fill large pot with cold water, making sure you have enough room for both the pasta and the broccoli florets.
  • Bring to a boil and add pasta only.
  • Cook for 6 minutes, then add the florets and cook for 1 minute longer, until the pasta is tender and the broccoli is just blanched.
  • Drain well.
  • In a large salad bowl, combine the remaining ingredients and whisk until blended well and slightly thickened.
  • Add the drained pasta and broccoli into the big bowl with the oil mixture, and toss to coat evenly.
  • Taste and add salt and freshly ground pepper to taste.
  • May be served warm or at room temperature.

Monday, September 14, 2015

All About Broccoli: Nature’s Perfect Food

You probably didn’t see what was so great about broccoli as a child, but the truth is that this vegetable is one of nature’s superfoods! From its stalk to its flowering head, broccoli is packed with nutrients and vitamins needed for your overall health and wellbeing - and it goes great in a wide variety of dishes. This vegetable has been around for centuries, and it has always been used and viewed as the perfect go-to food.

It’s healthy, can be eaten in a number of different ways, comes with lots of health benefits, is easy to cook, and offers the body a single boost of minerals in every serving. Here's some interesting information about broccoli for the cook and health enthusiast alike.

Understanding Broccoli from Top to Bottom

Many people aren’t aware just how much there is to know about broccoli. Yes, it’s a vegetable, and yes, it’s incredibly good for you—but that’s not all. This anatomical breakdown of broccoli should teach you everything you need to know about this vegetable and more. So, let’s begin with the basics.

What Exactly is Broccoli?

An edible green plant belonging to the cabbage family, broccoli is a vegetable that originated in Italy as many as 2,000 years ago. While, its flowering head is usually used as a vegetable in a variety of meals, the entire vegetable can be eaten and contains a host of nutritional values.

Arranged like a small tree, broccoli closely resembles cauliflower, which is another vegetable of the same species. Due to its rich green color, broccoli is high in antioxidants and other essential vitamins.

Parts of the Broccoli Plant

A broccoli plant is made up of three main parts:

•    The root system
•    Leaves and stalk
•    The crowning head

When still in the ground, the root system of the broccoli plant needs nutrient-rich soil in order to grow and support the plant. Broccoli plants need to be watered often in order to keep the plant hydrated and well fed as it approaches maturity.

The leaves and stalk are lesser-known parts of the broccoli plant because gardeners and farmers often discard these pieces at harvest. However, they are actually edible and highly nutritious. Broccoli leaves can be long and thin or short and wide and grow along the stalk. They are often blue-green in color and thicken towards the head of the plant.

The crowning head is the part of the broccoli most familiar to people. Sometimes called the curd or the head, the top of the broccoli is most commonly eaten. This head is made of small, dense edible floral shoots. Usually, the head is harvested long before the shoots, or little florets open. Sometimes the heads are purple, but the green shoots are most commonly cultivated by gardeners. The best growth environment for the broccoli plant is in full sun, with plenty of water, and of course, the nutrient rich soil mentioned earlier.

What is Broccoli’s Nutritional Value?

Broccoli is a great food to eat when you are looking to get extra fiber and vitamin C into your diet. When grown in organic, nutrient-rich soil, broccoli contains various nutrients that hold anti-cancer properties and support a strong, healthy immune system.

A great source of natural energy, broccoli is low in carbs, and fat but high in protein.

Nutrients: It contains B vitamins, Thiamine, Niacin, Riboflavin and Folate as well as traces of calcium, iron, potassium, and phosphorous.

High Fiber: Broccoli is also high in fiber that supports heart health, helps lower bad cholesterol and supports healthy weight management because it is filling and very low in calories.

How is Broccoli Prepared?

Broccoli can be steamed, boiled, microwaved, stir-fried, or eaten raw. However, over cooking or boiling broccoli has been proven to reduce levels of anti-carcinogenic compounds present in the food. It is therefore best to eat it raw, or to steam it until it reaches a bright green color, but no longer.

How You Can Add More Broccoli to Your Diet

Adding broccoli to your daily diet can do wonders for your health. A side of broccoli at dinner, a broccoli salad for lunch, chopped broccoli along with eggs or in an omelet for breakfast, or even chopped and eaten raw as a healthy snack is great way to include this superfood in your diet.

All parts of broccoli can also be juiced, including the stems, leaves and heads, and it makes a great addition to green juice, along with kale, spinach, green apples, celery, cucumber, and lemon.

Be sure to check back later this week for some tasty broccoli recipes to try!

Friday, September 11, 2015

Recipe: Naturally Fermented Raspberry Ginger Soda

One of my favorite ways to use fermentation is in making my own sodas and even hard ciders. It's relatively easy, produces a delicious and MUCH healthier beverage than you can buy in any store, and is a lot of fun!

This naturally fermented raspberry soda is easy to make, and absolutely delicious! It contains lots of natural wild yeasts and probiotic bacteria to help aid digestion, and it's packed with the fresh juicy flavors of late summer raspberries, with a kick of ginger.

Check out the recipe here:

Raspberry Ginger Soda

Ingredients:
Instructions:
  1. Puree the raspberries in a food processor or blender, and then strain them through a fine-mesh sieve or piece of cheesecloth, pressing them to extract about two cups of juice. Discard the seeds.
  2. Stir the ginger bug well to aerate it and to distribute the wild yeast and bacteria it contains, and then strain about a cup of the ginger bug liquid into the raspberry juice. Return any stray bits of ginger that remain in your strainer to your ginger bug container. Whisk water into the raspberry and ginger bug. 
  3. ......................................................
Get the Full Recipe at The Nourished Kitchen... 

 Image Source: TheNourishedKitchen.com.


Wednesday, September 9, 2015

Recipe: Homemade Yogurt

Yogurt is one of the easiest fermented foods there is. You can make it at home, yourself, with no special equipment and no fancy ingredients - all you need is good old milk (whole milk works best), and a cup of storebought yogurt (be sure to get the kind that says "Active Live Cultures" were added after pasteurization).

Homemade yogurt is not only simple to make, but it won't contain any of the sugars or thickeners that are added to store-bought yogurts, so it's much healthier for you. If you want a sweeter yogurt, you can add berries, or other fruit, honey, maple syrup, or granola to the finished product when it's ready to eat. Homemade yogurt is also great in smoothies!

There are lots of things you can do with homemade yogurt, and it's generally easier on the stomach than non-fermented dairy products, plus it's full of healthy probiotics that many say can aid digestion and improve your overall health.

Here is a simple recipe to get you started:

Homemade Yogurt
(Makes 1 quart (4 cups) yogurt.)

Photo courtesy of Mister GC at FreeDigitalPhotos.net.
Ingredients:
  • 4 cups (1 quart) milk
  • 3 tablespoons plain yogurt (purchased or homemade)* or powdered yogurt starter (amount specified on package)**
  • Flavorings such as jam, honey, dulce de leche, molasses, fresh or dried fruit, garlic, herbs, etc (optional)
Notes: *If using store-bought yogurt, choose a yogurt that tastes good to you. It's important to select an unsweetened version that contains live cultures, but the fat content doesn't matter. 

**Powdered starters can be found at some grocery and health food stores and from online sources such as the New England Cheesemaking Supply Company. Read the package instructions to determine how much starter to use for a batch of yogurt—many come in small envelopes or packets perfectly sized to make a single batch.

Equipment Needed: Candy thermometer; yogurt maker (optional) or other incubator, such as a thermos; cheesecloth for straining (optional); Mason jars or other container for storage.

Visit Epicurious.com for full instructions...

Monday, September 7, 2015

The History & Health Benefits of Fermented Foods

We've probably all heard of the great health benefits of "superfoods," but did you know that the simplest, most basic, and inexpensive foods can become super foods through a very simple process that you can easily do yourself, at home?

What is this magical process?

It's called fermentation.

Image Courtesy of Suat Eman at FreeDigitalPhotos.net.
Fermented foods have a rich history of tradition, and methods of fermentation have been passed down through generations. It’s safe to say that fermentation may have saved the human race during times of drastic climatic changes such as droughts and floods.

Every culture has its own history of fermentation and within these various cultures, traditional tastes and methods began to emerge, so we have the Greeks who perfected the fermentation of yogurt and different breads made with cultures such as sourdough.

We know that Egyptians produced sourdough cultures for making bread as early as 4000 B.C.E. and also fermented wine and cheeses. It may have been completely by accident that some fermentation methods were discovered, but these methods have certainly made an impact on the history of food preservation.

As early as 2,000 years ago, the Chinese were building the Great Wall of China and began to ferment cabbage as a way to feed the workers. During an invasion of Genghis Khan in Eastern Europe, he introduced the cabbage and it became a staple among peasants and sailors who took huge kegs on long voyages for its abundance of Vitamin C. Eventually, the fermented cabbage came to the Americas, where it was known as ‘sauerkraut’ from the German words, sauer (sour) and kraut (vegetable). Although sauerkraut wasn’t originated by the Germans, it is now considered a German dish.

Yogurt and cheese are examples of a successful attempt to preserve milk. In the early days, wandering nomads carried milk in special animal stomach canteens. Since animal stomachs have the enzyme, rennin, which coagulates (curdles) milk, the nomad would have curdled milk or cheese to eat.

History tells us that Sumarians and Egyptians had cheese as early as 4,000 B.C. and the Bible mentions that David, future king of Israel, ate cheese and presented it as a gift to the army of Israel.

Salt began to be used for preserving meats in the form of sausages and later, microorganisms helped to ferment meat and preserve them for later use. Fermenting meats was very important before freezing and refrigeration brought a way to keep meats without the fermenting process.

Photo courtesy of  xedos4 at FreeDigitalPhotos.net.
And of course, beverages such as wine and beer have been made and consumed by humans for thousands of years - often as an alternative to tainted water that was unsafe to drink.

The history of fermentation the world over is an interesting journey. Every culture has its own fabulous recipes and methods for creating amazing dishes. Not only are these fermented foods an ancient method of preservation that stands the test of time, they are also have lots of health benefits for humans. For one thing, they contain enzymes that help digest your food, and prevent a number of digestive issues.

Fermentation also makes the foods themselves easier to digest, which puts less stress on the body, and may help prevent the development of allergies and other food sensitivities. For example, many people are lactose-intolerant, but may consume fermented forms of dairy such as yogurt or kefir. Some research has shown that regular consumption of fermented foods may actually decrease the incidence of lactose intolerance.

In the modern world, the decline of consumption of fermented foods is sometimes thought to be the cause of the increase in many modern digestive ailments and diseases. Humans have been consuming fermented foods for thousands of years - long before the advent of modern processing methods, which in some cases may make foods more difficult to digest, and less nutritious - the opposite of what fermentation does to food.

Adding fermented foods back to your diet is an easy way to gain the health benefits of super foods, without spending an arm and a leg on exotic fruit extracts and other such substances.


Friday, September 4, 2015

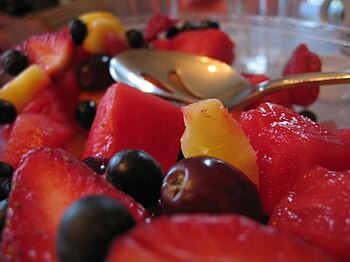
Potluck Recipe: Minty Citrus Sweet Fruit Salad

Fruit salad is always a summer favorite at potlucks! With tons of fresh, juicy fruit in season, it's easy to find the ingredients, and a jiffy to throw together at the last minute. This one combines the fresh, summery flavor of mint with tangy citrus juice and honey for an all natural and healthy dessert treat. You may not even want to take it to the pot luck, but save it for yourself!  :-)

Minty Citrus Sweet Fruit Salad

Ingredients:

Close-up of fruit salad
Fruit Salad. (Photo credit: Wikipedia)
1/4 cup finely chopped fresh mint
1/4 cup fresh squeezed lime juice
1/4 cup fresh squeezed orange juice
1/4 cup natural honey
1 can (15 oz) pineapple chunks (or fresh)
1 large cantaloupe, cut bite sized pieces (or 2 cups diced watermelon)
3 cups berries (any in season)
2 cups seedless grapes, halved
1 tart apple, washed, cored, diced
1 cup chopped pecans or other nuts

Directions:
  • In a large serving bowl, put the mint, lime juice, orange juice, and honey, and whisk until well blended and slightly frothy.
  • Add to the bowl the everything EXCEPT the nuts, and stir gently to combine.
  • Cover bowl and refrigerate for at least 1 hour.
  • Stir again gently before serving, then top with nuts and serve.
  • Will serve 8 small portions at a potluck, but can easily be doubled or tripled for larger crowds.

Wednesday, September 2, 2015

Potluck Recipe: Mexican Bean Salad

In a hurry and don't have much time to throw together something for this afternoon's potluck? You can't go wrong with this delicious bean salad - and you may already  have everything you need in your pantry and freezer. Throw these together in a nice bowl, toss, and you'll be ready to go!

Mexican Bean Salad
(Makes 10-12 pot luck servings.)

Ingredients:
Colourful bean salad.
Bean salad. (Photo credit: Wikipedia)

1 cup white wine vinegar
1/4 cup olive oil
1 Tbsp brown sugar
1/2 tsp kosher salt
1/2 tsp black pepper
dash chili powder (to taste)
2 cans (15 oz ea) garbanzo beans, drained and rinsed
2 cans (15 oz ea) cannelini beans, drained and rinsed
2 pkgs (10 oz ea) frozen baby lima beans, thawed and drained
3 regular size carrots, finely diced
1/2 cup chopped sweet onion
1/4 cup chopped fresh cilantro
1 or 2 jalepenos, finely diced
Optional: mixed greens for serving

Directions:
  • Put the first 6 ingredients in a large serving bowl and whisk vigorously until frothy.
  • Add the remaining ingredients and stir together gently until well coated.
  • Cover bowl and refrigerate for 1 hour, stirring several times during the hour, then stir again just before serving.
  • May be served over mixed greens if desired.