Monday, June 29, 2015

Gas Grilling 101: How To Get Grilling Today!

So you just purchased your first state-of-the-art gas grill - just in time for the 4th of July barbecue. Congratulations! Now you just need to figure out how to grill great steaks on it by this weekend.... 

Welcome to Grilling 101! Here you'll find the basics of what you will need to know to get off to a great start. Grilling is an enjoyable pastime that should end with great food. But it is important to understand the basics of your grill, how the heating works, and a few techniques to help you get the most out of your grilling experience.  Let's get started so you can fire up your new grill, and impress your guests this Independence Day!

The Basics

English: A photo of a propane gas grill.
Propane gas grill. (Photo credit: Wikipedia)
Don't let your gas grill scare you.  Sure, it may seem like a giant piece of fire-breathing metal that can singe your eyebrows and sear a whole cow, but you can handle it!  There are just a few basics you need to know about your grill before you begin cooking on it.  Now, for this discussion, I am assuming that you already have your grill assembled and it's on your patio ready to go.

First, many gas grills have ignition switches powered by batteries, so be sure that your batteries are good. If you press the ignition button and it doesn't click, stop. If you are smelling gas as you turn the dial, something went wrong.  Again, stop. Turn off the gas and read the lighting instructions again.  If you replaced the battery and the ignition still doesn't click, you need to get it fixed. Most serious grillers keep grilling matches handy just in case the ignition lighter fails. Remember to read your owner's manual to find out exactly how to light your gas grill with a match if necessary.

The next most important concept to remember is to be sure your propane tank actually has gas in it. There is a gauge on the tank structure that measures the gas in the tank.  Pay attention to it.  Also, you can install a special gauge to let you know how much gas is left in the tank. Invest in one of these gauges if you want a more accurate measure of when you are running low.  When you are trying to get dinner on the table, it's not a good time to realize you are out of gas. Many gas grill cooking fans keep two gas tanks on hand; one on the grill and one as a backup. It's a good idea, especially if you do a lot of long cooking periods, like rotisserie cooking.

The Heat

Once you are all set and ready to go, you need to understand how your grill heats. It will likely take a few times cooking on it to understand where the hot and cold spots are on the cooking surface. Many people don't consider how important it is to place your food properly on the gas grill. But, when you learn how to use the heat effectively, your grilling enjoyment will increase tremendously.

The cooler spots, also called 'indirect' heat, are great for grilling vegetables and other side dishes, while the hot areas are best for searing or charring meats. When you make use of the different spaces on a grill's cooking area, not only do you have food that comes out perfectly, but you also have food that comes out on time. We really dislike letting food get cold while waiting on other dishes to finish cooking!

The best way to begin to get acquainted with your grill is by holding your hand over the different areas to see where it feels hottest. You can also get an infrared thermometer that will give you more exact measurements, but your hand will usually suffice. Either way, be sure you figure out where the heat is high, medium, or low. Then follow your grilling recipes to get the best results.

The Technique

When talking about grilling basics, of course we have to include steak! So, we'll start there. It is very important that your steaks be at room temperature before putting them on the grill.  If the steak is cold, it will toughen up as it cooks.  Now, if you ask friends about the proper grilling technique for steak, you may hear from some to “only flip once.” This is a common misunderstanding among beginning and even some intermediate level grillers. The idea of only flipping your food once really only applies if you are cooking a steak rare.  Otherwise, it's difficult to do. There are two main flaws with this type of reasoning.

Steaks on a grill
Steaks on a grill (Photo credit: Wikipedia)
If you place a piece of room-temperature meat on a 350 to 400 degree grill, even if you oil the meat or the grill grates, the meat is going to stick to the grill as the oil burns away.  And, if you leave a piece of meat on a 350 to 400 degree surface for 5 to 7 minutes before you turn it, you could be biting into a burnt piece of meat rather than the juicy steak you were expecting.  A minute or two just to sear the meat surface first will suffice, so, flip, flip, flip, flip is just fine. Your grill manual will have some great advice on this as well. 

Now let's talk chicken. If you've been stocking up on boneless, skinless chicken breasts for grilling season, stop!  The bone and skin both help keep the chicken moist and flavorful.  You can always remove the skin and the bone before serving if you like. You'll save a ton of money - and your chicken will be much tastier!

With that said, perhaps you're a fan of crispy chicken skin.  In that case, another technique that is often misunderstood is how to get the skin crispy without drying out the chicken.  Many grillers mistakenly believe that crispy skin comes from grilling chicken at a high heat.  It's exactly the opposite.  Set your chicken skin side down on medium heat directly over the heat source until the skin chars nicely, then flip over and move to indirect heat, keeping the grill only on medium heat.  Close the grill and let the chicken cook until it's done. This technique ensures crispy skin and chicken that is cooked through without the outside burning up.  Slow cooking is the trick to perfectly juicy chicken and crispy skin.

See how easy it is to grill with just a few tips?  Once you get a grilling success or two under your belt, you'll be ready to expand your repertoire.  But I bet you return to these classics over and over again so you can show off your skill as a Grill Master!

Now get your grilling tongs at the ready, and prepare for some tasty grill recipes coming later this week just in time for the 4th of July!


Friday, June 26, 2015

Recipe: Sea Scallops With Lime & White Wine Sauce

This quick, easy, delicious dish makes a great "date night" or special occasion meal on a warm summer evening. Lime juice, garlic, and white wine make a delicate and tasty sauce for the mild sweetness of sea scallops, which go great with summer. You and your honey will be enjoying your special dinner in no time!

Scallops With Lime & Savory White Wine Sauce
(Serves 2.)

Ingredients:

English: Scallops Provencal, "Tender, ten...
 (Photo credit: Wikipedia)
1 Tbsp butter
2 garlic cloves, minced
1/2 cup white wine
2 cups chicken broth
2 limes; one juiced, one halved and cut into thin slices
1/2 cup chopped cilantro
1 lb. sea scallops
1 Tbsp olive oil
salt and pepper to taste
cooked linguine or rice

Directions:
  • Put butter in a saucepan along with garlic and cook over low heat until garlic is just fragrant and softened.
  • Add white wine and cook, stirring, for 2 minutes, then add the chicken broth and bring to a gentle simmer, allow to simmer for 5 minutes, stirring occasionally.
  • Add the juice of 1 lime to the saucepan, then add the cilantro, stir, remove from heat, cover and set aside.
  • Prepare the scallops by putting them in a large bowl with 1 Tbsp of olive oil and a dash of salt and pepper. 
  • Heat a large heavy skillet over medium-high heat and add scallops, cooking very quickly, stirring until golden brown on the outside and cooked through, about 3 or 4 minutes at the most.
  • Add the lime slices and continue cooking, stirring, for 30 seconds longer, then turn this mixture into a large serving bowl and pour the sauce from the saucepan over the scallops, cover and let sit for a couple minutes.
  • Serve over linguine or rice with the sauce poured over.

Wednesday, June 24, 2015

Recipe: Citrusy Spinach & Sirloin Salad

Cool, fresh salads make great summer meals, and this one pairs juicy sirloin steak with citrus, ginger, and spinach for a fresh, zesty, and satisfying lunch or light supper.

Citrus Embellished Spinach And Sirloin Salad
(Serves 4.)

Ingredients:

1 lb. top sirloin steak
salt and pepper to season
2 Tbsp cooking oil
1 tsp salt
1 tsp pepper
1 grapefruit
1 orange
1 Tbsp white wine vinegar
1 garlic clove, minced
1 tsp freshly grated ginger root
1 tsp Dijon mustard
1 tsp honey
dash salt and pepper to taste
1/4 cup good light olive oil
10 oz. baby spinach

Directions:
  • Sprinkle salt and pepper on both sides of steak.
  • Put 2 Tbsp cooking oil in a heavy skillet over medium-high heat. When oil sizzles, add steak and sear on both sides quickly, then flip again and cook each side for 4 to 5 more minutes or until steak is done to your liking.
  • Remove steak from pan to cutting board and let rest for 10 minutes.
  • While the steak is resting, peel and segment the grapefruit and orange over a large bowl to save the juices, putting the fruit aside in another bowl. 
  • Into the bowl with the juice collected from the fruit, add vinegar, garlic, ginger, mustard, honey, and a dash of salt and pepper to taste, and whisk until combined. Continue whisking while slowly drizzling oil into the mixture.
  • Slice the rested steak very thin against the grain and at a diagonal.
  • Make salad by tossing together the spinach, fruit, together with dressing, then top with steak and toss gently.
  • Serve immediately.

Monday, June 22, 2015

7 Tips for Indoor Citrus Growing Success

As we mentioned last week, growing your very own citrus garden will take planning and a bit of work, but it's something you can do, even in very small spaces, and with very little experience. The following is an overview and a few tricks to help give you a citrus green thumb.

Citrus plant
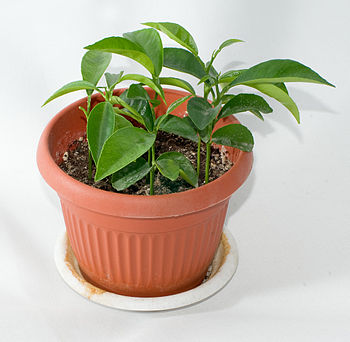
Potted lemon tree. (Photo credit: Wikipedia)
1. Pot plants correctly - A deep container, either clay or ceramic, works well. Citrus roots are fairly deep, so you'll need a pot that allows roots to grow down deep. Be prepare to have about 3 or 4 pots in progressively larger sizes on hand for the transplants.

2. Use a sterile all-purpose potting mix - If you can't find a potting mix designed especially for citrus, just make sure your potting mix is slightly acidic. Peat moss is a good additive to bring acidic levels up. If you're unsure, ask at any garden shop and they can help you. You can also add citrus rind peelings to the soil to get the acid levels up.

3. Give mature citrus trees a chilly bedtime - During the day, you want a warm location, but citrus likes to be chilly at night. A temperature around 50 to 60 degrees is good for a citrus tree's bedtime, but only after your citrus plant grows up.

4. Provide lots of the right light - A southeast facing window works well in most regions. The plant will get sunlight, but not get scorched, as they might in a southwest window.  If you don't have enough natural light, think of adding plant lights to create a 'grow station.'

5. Maintain evenly moist soil - Don't let the soil dry out between watering. Keep the soil moist, making sure you don't add so much water that the plant is sitting in a puddle. Stick your finger in the soil and if it feels dry more than an inch below the surface, add water.

6. Keep the humidity high - Citrus plants want a humidity level around 50 to 60 percent. Keep that in mind when you choose the location for growing your citrus tree.  Mist your plants daily and group the plants together.  This helps both to make it easier for you to mist your plants, and it also creates a little ecosystem where the plants are sharing their humidity with each other.

7. Control pests - The most likely pests are white-flies and spider mites. Natural insecticidal soap controls virtually all the pests for houseplants. Do the research and choose a method that works best for you and your environment.

Fun All-Natural Citrus Planting Trick

Okay, you've got all the step-by-step instructions and tips for planting and growing citrus fruits from seed to tree.  But, do you want to do something a little bit off the grid?  Here's a fun spin on planting citrus that you, and especially your kids, may enjoy doing.
  • Choose a large, thick citrus fruit.  A grapefruit works well, but a thick orange would work, too. Juice the fruit and take out enough of the membrane to form an empty bowl shape.  Separate a couple seeds and rinse them off.  Spoon some good potting soil into the 'fruit bowls' and place your seeds in the soil of both halves of the grapefruit, tamping the soil down lightly.  Water and place in a sunny area just like you would a regular pot. Make sure you provide lots of sunshine, warmth, and water so the seeds sprout.
  • When the sprouts turn into little plants, leafing out and getting tall, just pick up the entire grapefruit and plant it in a bigger pot filled with good potting soil. The grapefruit rind will decompose which actually helps fertilize the soil as well as adding acidity to the potting mix, which is often needed in a commercial mix.
This project is definitely a win-win situation.  The grapefruit 'pot' is pretty, totally biodegradable, and adds acid to the potting soil. You might even say this is an all-in-one garden starter kit in a nifty little package.  How fun is that!  Well, nobody ever said you had to take planting a citrus tree seriously!

Friday, June 19, 2015

Recipe: Thai Lime Ginger Seafood Chowder

Thai food is my absolute favorite cuisine! I love all the fresh and zesty flavors, and how well all the fresh ingredients go together to make something amazing.

This recipe may look like it has a lot of ingredients, but most of them are herbs and spices, so it's actually pretty easy to make. You should be able to find fresh ginger, lemongrass, and fish stock at any Asian store.

Oh, and for an interesting flavor twist, use 2 kaffir lime leaves, cut in thin strips, instead of lime zest - if you can find them at the store, or if you have your own kaffir lime tree like I do!  :-)

Thai Lime Ginger Seafood Chowder
(Serves 4-6.)

Ingredients:

English: Tom yam kung nam khon (Thai script: ต...
Thai seafood soup. (Photo credit: Wikipedia)
3 Tbsp peanut oil
1 yellow onion, minced
1 Tbsp minced garlic
2 tsp grated lime zest
2 tsp minced lemongrass
1 Tbsp fresh ginger, peeled and grated
2 tsp ground coriander
1 tsp ground cumin
1/2 tsp ground black pepper
1 1/2 cups fish stock
2 cups coconut milk
1/4 cup fresh cilantro, pureed with 1 Tbsp water
1 Tbsp lime juice
1 Tbsp brown sugar
Salt to taste
2 small cucumbers, peeled and quartered lengthwise, seeded, then cut into small chunks
1 lb fish fillets, use white fish that is firm, cut into 2 inch chunks
1/2 lb medium size shrimp, peeled and de-veined
1/2 lb small sea scallops
1/2 lb lump crab meat
1/2 lb clam strips

Directions:
  • In a large soup pot over medium heat, add peanut oil and onion, and cook stirring about 4 to 5 minutes or until just getting translucent.
  • To soup pot add garlic, lime zest, lemongrass, ginger, coriander, cumin, and black pepper, cooking and stirring for 3 to 4 minutes until fragrant.
  • Add fish stock, coconut milk, pureed cilantro, lime juice, and brown sugar and bring to a boil, then reduce heat to low and simmer slowly for about 4 to 5 minutes, then season with salt to taste.
  • Add to the soup pot the cucumbers and the fish and simmer slowly for 8 to 10 minutes or until fish is opaque, then add the remaining seafood and simmer an additional 5 to 8 minutes or until the shrimp have turned pink.  Serve hot with salad on the side and crusty bread.

Wednesday, June 17, 2015

Recipe: Crock Pot Oregano Rubbed Lemon Chicken

Crock pots are great for summer cooking, as you can set your dinner to cook and go off and enjoy the beautiful summer weather, without slaving over a hot stove, or heating up the kitchen by running the oven for several hours.

This tasty and simple recipe combines the classic flavors of lemon and chicken. You'll have a tasty dinner the whole family will love all ready when you get back from the pool!

Crock Pot Oregano Rubbed Lemon Chicken
(Serves 6.)

Ingredients:

This image shows a whole and a cut lemon.
 (Photo credit: Wikipedia)
1 tsp dried oregano
1/2 tsp salt
1/4 tsp ground black pepper
2 lbs. chicken breast halves, boneless skinless
2 Tbsp butter
1/4 cup water
4 fresh lemons, squeezed
2 garlic cloves, minced
1 tsp chicken bouillon granules
1 tsp chopped fresh parsley

Directions:
  • Mix together the oregano, salt, and pepper in a little bowl and then rub this mixture into the chicken.
  • Put butter in a large heavy skillet over medium heat, and when butter melts and skillet is hot, set chicken in and brown it on both sides, about 3 to 5 minutes each side. Remove the chicken and arrange evenly in the crock pot. 
  • In the same skillet, add the water, lemon juice, garlic, and bouillon, and bring this mixture to a boil, stirring to get up the browned bits from skillet, then immediately pour over the chicken in the crock pot.
  • Cover and set crock pot to LOW and allow to cook for 6 to 7 hours. 
  • 15 minutes before the end of cooking time, sprinkle parsley on top of the chicken, cover the crock pot and continue cooking the remaining 15 minutes.
  • Serve with a side of rice or potatoes if desired.

Monday, June 15, 2015

How to Create Your Own Homegrown Citrus Garden

There is something thrilling about growing a citrus garden at home.  It almost defies nature.  I think that's because when you think of citrus, you inevitably imagine a sunny tropical oasis where citrus trees line an orchard and the fragrance overwhelms you with every step.

But citrus is sometimes grown where the climate gets a little colder.  In these climates, the trees need to be brought inside until they are mature enough to keep them from getting too cold. So, yes, citrus trees can be grown indoors.  Let's take a look at how to start growing citrus from a seedling, how to grow citrus indoors, and finally, some interesting citrus garden fun.

Choose the Seeds

English: Mandarin (Citrus reticulata) in flowe...
Mandarin (Citrus reticulata) in flowerpot. (Photo credit: Wikipedia)
Growing citrus from seeds is surprisingly straight forward, and something that anyone can do if they have a warm, sunny windowsill. You can either get citrus seeds through a gardening supplier or, even easier, collect your own from the citrus you eat. Choose organic, naturally grown citrus fruits to eliminate added chemicals, especially the ones used to prevent seed germination, which you definitely don't want when trying to sprout your seeds.

Cut the citrus open to expose the seeds. Remove the seeds and wash lightly. Place the ‘clean’ seeds into a bowl or glass of fresh water. This is in order to sort good seeds from bad seeds.  Discard any seeds that immediately float to the surface or are cut or split, as these are probably not going to germinate. Once you have culled your seeds, they can be either germinated or dried and stored in a paper envelope until you're ready for them.

Time to Germinate

Citrus seeds require a period of dormancy in cold temperature in order to initiate germination. To get your seeds 'in the mood' to germinate, you'll need to refrigerate them.

Prepare a little germination chamber by first laying the seeds on a damp paper towel, then fold the paper towel over the seeds, completely encasing the seeds inside.  Now slip the paper towel into a ziploc plastic bag or airtight food container, then place in the produce drawer in your refrigerator.  It should take about four to six weeks to germinate the seeds this way. 

Time to Plant

When you unwrap your germinated seeds, you'll see a little sprout.  It's time to condition your seeds and prepare your pots. Put the seeds in cool, clean fresh water and allow to soak for a few hours. Meanwhile, prepare small pots, about 2 to 3 inch size, one for each seed. Choose a tray for draining that fits under the pots. If you have a somewhat sunny, not scorching hot, windowsill, a long narrow tray with several small pots works well. 

Fill the pots with a handful of pebbles in the bottom, then a light, fluffy potting soil. Moisten the soil so it's damp, but not waterlogged. Carefully take each seed, sprout side up, and push a hole in the soil, then drop the seed in, making sure most of the sprout is above the soil. Tap down lightly around the sprout and gently sprinkle a little water in each pot.

Watch the sunlight and water carefully. The sprouts need to be warm, not hot. The soil needs to be moist, not  waterlogged.

The seedlings can be left in these pots until they are about 4 to 6 inches tall.  Then you'll need to prepare bigger pots, but be sure to only go up one size.  A plant that has too much room for the roots won't spend any time growing up.  It will put all it's effort into growing more roots to fill the pot.  You need a good amount of green leaves for your plant to mature, so you want your plant to grow upward and not just into more roots.

Unripe Meyer lemon, Citrus × meyeri.
Unripe Meyer lemon on tree. (Photo credit: Wikipedia)
Your Citrus Plants Grow Up

Once your citrus plants are in their next size pot, you can start to 'harden off' the plant if weather in your area permits.  This just means they can be moved outside to a sheltered area where they will get some warm, indirect sunlight and gentle breezes.  Remember, they're still baby plants, so avoid hot sun and strong winds. 

If you're ambitious, you can take the plants out daily, then return them to shelter overnight.  It all depends on your weather and your set up. You will want to keep in mind your citrus plant's native lands when you consider the environment you give them. Citrus plants like warm days and cool nights, so try to mimic that for them.

When the plants appear to be toppling over in their pots, you'll need to transplant them again.  Remember just to go up one pot size at a time.  You may do this several times until your citrus plant has reached the desired size.  Most people who grow citrus fruit at home choose small varieties of lemons and limes to start with because the plants are smaller and easier to handle.

Once your citrus plant has reached a healthy size, you can choose a spot outside for it to live during temperate seasons. During months where freezing weather occurs, you'll need to move your plants inside. You'll just need to make sure they get enough sunlight and water.  You'll also need to research organic fertilizers and choose one that works for you to keep the plant nourished and fed.

Blossoms and fruit may not appear for several years.  Don't be frustrated.  Let the plant mature, keep it healthy, and you will be rewarded for your patience with tasty citrus fruits for your kitchen!

Friday, June 12, 2015

Recipe: Ugli Rosemary Lamb Chops

Mmmm...lamb is such a great meat to serve with citrus! The fresh tartness of the ugli fruit helps cut the richness of the meat. This simple one-pot recipe has only a few ingredients, so it's a snap to prepare and enjoy.

Ugli Rosemary Lamb Chop Bake
(Serves 4.)

Ingredients:

4 medium-sized lamb chops
1 cup uncooked long grain white rice
1 Ugli fruit, half segmented, half squeezed
2 1/2 cups beef stock
8 rosemary sprigs
Salt and pepper to taste

Directions:
  • Preheat oven to 350 degrees. Butter or oil a 9 x 13 inch shallow baking pan.
  • Heat a heavy skillet until sizzles, then put chops in, searing on both sides until a golden brown crust forms; take off heat and set aside.
  • Evenly sprinkle rice in the baking dish.  Lay the chops over the rice.
  • Lay the segments of Ugli fruit over the chops, mix the squeezed Ugli fruit juice with the beef stock in a glass bowl, then pour over the rice in the baking dish.
  • Place two sprigs of rosemary on top of each chop.
  • Add salt and pepper to taste, then tightly seal the baking dish with foil.
  • Bake in preheated oven for 50 to 55 minutes or until the rice is tender and the lamb is cooked through. 
  • Remove from oven and let sit for 5 minutes.
  • Remove the rosemary sprigs and discard. Serve hot with a green salad or steamed vegetables.

Wednesday, June 10, 2015

Recipe: Pomelo Lime Shrimp Salad

Pomelos are great on their own, but with their tangy, juicy citrus flavor, they are also great for fresh summer recipes like this one. This simple recipe has a touch of Asian flair, with fresh lime, cilantro, and fish sauce, and the toasted toppings add a unique crunch. This is great for a light and tasty supper or lunch.

Pomelo Lime Shrimp Salad
(Serves 4.)

Ingredients:

Pomelos
Pomelos. (Photo credit: Wikipedia)
2 pomelos, peeled and segments cut out
3 limes, juiced
1 Tbsp fish sauce
1 Tbsp light brown sugar
1 tsp chopped cilantro
1 Tbsp chopped green onion
2 lbs. small fresh shrimp, cleaned, tails removed
1 Tbsp light olive oil
dash of red pepper flakes
1 Tbsp toasted chopped peanuts
1 Tbsp toasted shredded coconut
salt and pepper to taste

Directions: 
  • Preheat oven to 400 degrees.
  • Put pomelo segments, lime juice, fish sauce, brown sugar, cilantro, and green onion in a large bowl and stir well. Cover and refrigerate.
  • Put shrimp on baking sheet, drizzle with olive oil, sprinkle with red pepper flakes, and mix with your hands to coat well.
  • Bake in preheated oven for 3 to 5 minutes, just until pink.  Remove and allow to cool on sheet.
  • When cool, add shrimp to the bowl with pomelo mixture and stir to combine.
  • Spoon this shrimp-pomelo mixture out into small shallow bowls, then top with the peanuts and coconut. Salt and pepper to taste.

Monday, June 8, 2015

4 Unusual Citrus Fruits You Should Try

We are all familiar with the most common varieties of citrus such as oranges, lemons, and tangerines, but there are probably a few other kinds you are not aware of. Either they are not grown close enough to your region so you have access to them, or perhaps you just never thought to seek them out. Let's take a look at four unusual citrus fruits that might be worth getting to know.

1. Pummelo or Pomelo

South Indian Pomello cut in Half
Pomelo fruit.  (Photo credit: Wikipedia)
The pummelo, also known as pomelo, is the largest of the citrus fruits. It is native to southeastern Asia and Malaysia and grows wild in Fiji and surrounding Islands. Dr. David Fairchild is credited with the introduction of the pummelo into the United States. He began trying to introduce the tasty citrus in 1899, but was unable to reproduce the satisfying fruit until 1926 when seeds of a cultivar in Kediri were collected and sent to the Citrus Quarantine Station in Bethesda, Maryland, and grown successfully.

Since then, the pummelo has never attained significant status. However, it is casually grown as a curiosity in private gardens in Florida and the Caribbean area. At least one fruit-grower in Florida raises pummelos on a small commercial scale. You can find them in some larger grocery stores in the winter and early spring.

2. Minneola


The minneola is a cross between a tangerine and a grapefruit and can be recognized by 'the little nose' that distinctly sticks out from the fruit. It is actually a very specific type of tangelo (a cross between a Duncan grapefruit and a Dancy tangerine) and is marketed as an easy-to-peel citrus fruit. 

Minneolas were first released as a sustainable fruit in 1931 by the USDA Horticultural Research Station in Orlando. It is named after Minneola, Florida, where it was originally developed.  It is also called the honeybell fruit by some growers in certain areas. The sweet and juicy fruit matures December through February, and is at its peak of ripeness during the month of January.

3. Leech Lime

The lime is one of the most cultivated citrus fruits in the tropics. Shaped like lemons, limes are generally smaller and more acidic. The leech lime is a bit bigger than the traditional limes we see in the grocery store and has a warty skin. Leech limes are believed to be one of the most detoxifying of all fruits. So, if you want to cleanse your body, squeeze some leech limes into your water.

In Malaysia, a bit of folklore surrounds the juice of leech limes, as it is said to scare away evil spirits.  In modern times, the leech lime is basically either juiced for drinking and cooking, and the leaves are kept either fresh or dried, and are also used to flavor soups, curries, and sauces.

3 Ugli Fruits
Ugli Fruits (Photo credit: Wikipedia)
4. Ugli

The intriguing name is enough to entice you to try this citrus fruit.  Uglis are a specific kind of tangelo, easier to peel because of the loose skin. The skin may also have brown and green spots. The light green surface turns spotty and orange when the fruit is at its peak of ripeness.  In essence, it looks pretty ugly.  If you didn't know you were looking at an Ugli fruit, you might think you had a bad grapefruit in your hand.

The flesh is very juicy and the taste is often described as more tart than an orange but sweeter than a tangerine.  You might suspect from the flavor that the ugli fruit is a lemon-tangerine hybrid. The fruit is seasonal from December to April and peak distribution occurs in the United States between November and April.

You can fill the fruit bowl with oranges, lemons, limes, and tangerines, or you can surprise your family with a bowl of citrus they don't recognize.  Enjoy their puzzled expressions while you can, because it won't last once they dig in.  Then you'll see nothing but smiles, dripping with juicy citrus goodness!


Friday, June 5, 2015

Recipe: Minty Arugula Salad With Lime Dressed Quinoa And Grapefruit

If you've got loads of arugula in the garden right now like we do, this is a tasty and unique salad, full of fresh summer flavors like mint and lime. Quinoa provides protein and a nice crunch, making this a complete meal for a light lunch or supper - or serve as a side-dish with Wednesday's recipe of pan-fried Balsamic Orange Salmon!

Minty Arugula Salad With Lime Dressed Quinoa And Grapefruit
(Serves 4.)

Ingredients:

1 cup quinoa
2 cups water
1/4 tsp salt
1/2 cup fresh lime juice
1/2 cup olive oil
2 tsp honey
2 garlic cloves, minced
1 shallot, minced
salt and black pepper to taste
4 cups baby arugula leaves, cleaned and dried
1/4 cup chopped fresh mint
1/4 cup dried cranberries (optional)
1/2 grapefruit, peeled and sectioned

Directions:
  • Put quinoa in a dry skillet over medium heat and toss gently until fragrant.  It should smell slightly nutty; remove from heat.
  • In a large saucepan, add water and bring to a boil, then turn heat down to low.  Add salt and slowly stir in toasted quinoa. Keep heat on low, cover saucepan, and cook for 15 minutes. Fluff with a fork and dump into a bowl to cool.
  • In a small bowl, whisk together the lime juice, olive oil, honey, garlic, and shallot, taste and add salt and black pepper to taste, stirring well. 
  • Stir 3/4 of this dressing into the cooled quinoa, setting the remaining dressing aside.
  • In a separate large bowl, toss together the arugula, mint, and cranberries (if using).
  • To serve, using 4 chilled salad plates, divide the arugula mixture onto each salad plate, then top each serving with even amounts of quinoa mixture and grapefruit. Finish by drizzling each salad with equal amounts of the remaining dressing.

Wednesday, June 3, 2015

Recipe: Balsamic Orange Salmon

Salmon is a perfect light summer meal, and the fresh taste of citrus goes wonderfully with this meaty fish. This easy recipe is packed with fresh flavors. Fresh herbs right out of the garden will give it the finishing touch! Serve with fresh bread and a green salad for the perfect summer lunch or dinner.

Balsamic Orange Salmon
(Serves 4.)

Ingredients:

3/4 cup fresh orange juice
1/2 cup balsamic vinegar
2 tbsp olive oil
2 tbsp onion, finely minced
2 tsp chopped parsley
2 tsp basil, chopped
2 tsp chopped mint
2 tbsp orange zest
1/8 tsp kosher salt
dash freshly ground black pepper
4 fillets salmon (6 oz each)
Kosher salt
Freshly ground black pepper
2 tbsp olive oil

Directions:
  • Preheat oven to 450 degrees.
  • Combine the first 10 ingredients in a glass jar, cover tightly, and shake well to mix; set aside.
  • Season salmon fillets with salt and pepper to taste. 
  • Heat olive oil over medium-high heat in a large oven-proof skillet. 
  • Place salmon fillets in the pan, skin side down, and cook until skin starts to crisp.
  • Transfer skillet to the oven and bake for around 8 to 10 minutes.
  • Transfer cooked salmon to a serving platter and keep warm while finishing the sauce.
  • Pour the sauce from the jar into the skillet. Put on burner set on high and stir to warm through.
  • Spoon sauce over salmon and serve immediately.

Monday, June 1, 2015

What You Should Know About Citrus

Everyone thinks they know a lot about citrus. After all, we eat on an average at least several servings of citrus every week. But how much do you actually know about the juicy fruit you consume? Citrus has a rich background, some amazing health benefits, and some pretty awesome facts to go right along with it. Let's examine what everyone ought to know about citrus and see how we can enjoy it even more in our summer cooking!

History

Citrus sinensis: Fruits and foliage.
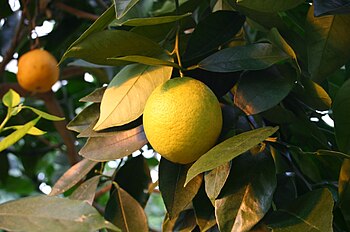
Citrus trees. (Photo credit: Wikipedia)
The various species of Citrus are all believed to be native to the subtropical and tropical regions of Asia and the Malay Archipelago, and to have spread from there to other sections of the world. Citrus has been cultivated through the ages, and in some pretty remote places.

The history of the spread of citrus reads like a romance novel. Even in very early times, the appearance of both the beautiful tree and fruit attracted the attention of travelers and received mention in their written narratives. However, no matter how loved citrus was, the spread of the citrus tree from one part of the world to another was actually quite slow.

Around 310 B.C. the first member of the citrus family was introduced to Europe. For several hundred years this was the only citrus fruit known. A tile floor mosaic found in a Roman villa near Tusculum indicates that lemons and limes were becoming known in Italy.  Another mosaic in Rome, this one designed about 330 A.D. for Constantine the Great, indicates that, at least in Italy, oranges and lemons were being grown.

It is now known that the sweet orange had been grown for many centuries in China and had apparently reached an advanced stage of cultivation before it became well known to Europeans. Han Yen-chih, wrote in 1178 A.D. and translated into English in the Monograph on the Oranges of Wên-chou, Chekiang, 1923, named and described some twenty-seven varieties of sweet, sour, and mandarin oranges. He also described citrons, kumquats, and the trifoliate orange and discussed nursery methods, grove management, and diseases.

Of course, other areas with temperate climates began to cultivate citrus as well.  Areas such as Spain and other tropical regions did their part to bring citrus to many lands, including the Americas. Through exploration and conquest, sweet juicy citrus found its way around the world.

Painting
Painting (Photo credit: Wikipedia)
Health Benefits

Citrus fruits have long been valued as part of a nutritious and tasty diet. The flavors provided by citrus are among the most preferred in the world, and it is increasingly evident that citrus not only tastes good, but is also good for you.

It's well established that citrus and citrus products are a rich source of vitamins, minerals, and dietary fiber that are essential for normal growth and development and overall nutritional well-being. However, it is now beginning to be appreciated that these and other biologically active, non-nutrient compounds found in citrus and other plants (phytochemicals) can also help to reduce the risk of many chronic diseases.

Citrus is most commonly thought of as a good source of vitamin C. However, like most whole foods, citrus fruits also contain an impressive list of other essential nutrients, including both glycemic and non-glycemic carbohydrate, potassium, folate, calcium, thiamin, niacin, vitamin B6, phosphorus, magnesium, copper, riboflavin, pantothenic acid and a variety of phytochemicals. In addition, citrus contains no fat or sodium, and, being a plant food, no cholesterol.

Fun Fact

Moro oranges are also called blood oranges because of their deep red colored flesh. But don't worry, it isn't real blood - they're really a sweet treat. After chocolate and vanilla, orange is the world's favorite flavor. Christopher Columbus brought the first orange seeds and seedlings to the New World on his second voyage in 1493.

How to Eat

Photo taken by Tokugawapants using Konica-Mino...
 (Photo credit: Wikipedia)
There are hundreds of ways to eat citrus. One of the most popular and easiest ways to enjoy citrus is to peel the fruit and separate it into individual segments.  Or you can just cut through the peeling and slice it into wedges and peel the juicy sections out.

You can also juice your citrus for a fun and tasty drink.  Both the juice of citrus and the zest is used in cooking to create flavorful dishes.  Also, using whole segments of citrus in salads, or even grilled, adds a bright flavor to many meals.  Citrus makes a wonderful marinade for fish, meat, and poultry, actually breaking down the fibers and tenderizing it, along with flavoring the dish. With so many ways to eat citrus fruits, there is almost no way you can go wrong, or get tired of it.

Learn more about citrus by trying new varieties and using it in new ways. That glass of orange juice you enjoy in the morning is just the beginning!

Check back later this week for some tasty ways to brighten up your summer cooking using citrus.