Friday, August 30, 2013

Recipe: Cheesy Eggplant Lasagna

This simple and tasty low-carb recipe uses eggplant as the "noodles" in this fun take on lasagna. Use medium-sized long or oval eggplants if you can, so you can get the slices to approximate lasagna noodles in size. This is another great way to use up all those fresh tomatoes, basil, and eggplants your garden may be full of this time of year! Packed with healthy goodness, this one is also a good recipe for those on a low-carb or gluten-free diet.

Cheesy Eggplant Lasagna

Ingredients:

2 medium eggplants, sliced in thin lengthwise strips
1 cup tomato sauce
1 pound tomatoes, sliced thin
1 cup ricotta cheese, softened
3/4 cup shredded mozzarella cheese
2 tsp dry basil or 1/4 cup fresh chopped basil
2 tsp Italian seasoning  
salt and fresh black pepper, to taste
cooking oil spray

Directions:
  1. Preheat oven to 400 degrees F.
  2. Season eggplant slices with salt and pepper. Arrange slices evenly in a nonstick baking pan and bake for fifteen minutes.
  3. Spray a glass baking dish with cooking spray and arrange eggplant slices evenly on the bottom. Pour half of the tomato sauce over the eggplant, then top with a few tomato slices. 
  4. Sprinkle salt, pepper, basil, and Italian seasoning over this mixture, then spread a little of the ricotta cheese over the tomatoes. Sprinkle some mozzarella on top. 
  5. Repeat in layers, topping with mozzarella as a final step.
  6. Bake for twenty minutes, then place under a broiler just until cheese turns golden brown.
  7. Slice lasagna evenly and garnish with Italian seasoning.
Enhanced by Zemanta

Wednesday, August 28, 2013

Recipe: Eggplant Italian Garden Pasta

Although it was far from a favorite of mine as a child, in recent years I've come around, and eggplant has now become a common ingredient in many of my summer dishes. The creamy texture and rich, mild taste of cooked eggplant is wonderful with another summer favorite - tomatoes. It goes great in many Italian dishes, such as this one, below, and is an excellent way to use up some of those excess summer veggies you have piling up in the fridge! This vegetarian recipe is a great idea for a "Meatless Monday" dinner, or add some fresh Italian sausage to the saute if you want to spice it up. Because eggplant cooks down so well, it is often hard to tell it is in the sauce, so it's a good way to "sneak" some into a meal even if your family doesn't care that much for eggplant.

Eggplant Italian Garden Pasta
(Serves 6.)
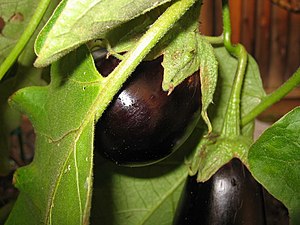
A long slender eggplant.
Long slender eggplants. (Photo credit: Wikipedia)

Ingredients:

2 yellow bell peppers
1 small eggplant, peeled and cut in 1/2-inch cubes
1 cup water
2 tbsp olive oil, divided
2 tbsp minced fresh oregano
2 tbsp capers
2 minced garlic cloves
1/2 tsp salt
1/4 tsp freshly ground black pepper
6 plum tomatoes, seeded and chopped
12 ounces bucatini or linguine
3/4 cup grated Romano cheese

Directions:
  • Turn your broiler on to preheat, setting the rack at about 6 to 8 inches. Choose a broiler pan or baking sheet and cover it with foil.
  • Cut bell peppers in half lengthwise, remove inside membrane and seeds. Place halves skin side up on prepared pan. Put under broiler for about 8 to 10 minutes or until blackened. (You can also do this on a preheated grill if you wish.)
  • Turn oven to bake at 425 degrees.
  • Remove pan from oven and carefully place peppers (while still hot) in a Ziploc bag, seal, then let stand for 15 minutes. Peel off the skin and charred bits, then cut into strips and set aside. 
  • Arrange eggplant cubes in a 2-quart baking dish in one layer. Pour 1 cup water over the eggplant and bake in 425 oven for 30 to 35 minutes or until tender, adding water as needed. Remove from oven and set aside.
  • Heat 1 tbsp of oil in a large nonstick skillet on medium-high heat. Add capers, oregano, and garlic and sauté for one minute. Stir in salt, black pepper, cooked eggplant, roasted bell peppers, and tomatoes. Cover skillet and reduce heat, simmering 15 minutes and stirring occasionally.
  • Cook pasta according to package directions. Drain pasta over a bowl, reserving 1/2 cup of this cooking liquid.
  • Toss pasta with remaining 1 tablespoon oil, then add to bowl with eggplant mixture; add reserved cooking liquid to coat the pasta; toss. 
  • Sprinkle with grated Romano cheese and serve immediately. 

Enhanced by Zemanta

Monday, August 26, 2013

Eggplant: Royalty In The Garden & The Kitchen

Despite being one of my most despised vegetables as a kid, eggplant is one of the most unique looking vegetables in the produce section, and is incredibly delicious in a number of dishes. The deep purple color gives it that royal look and is difficult to miss among the reds, yellows, and greens of a typical produce market. Eggplant catches our eye first, and gives us a great reason to walk over, pick it up and take it home for dinner. But what is it and what do you do with it when you get it home? Let's take a deeper look at this versatile vegetable.

What is It?

Eggplant
Eggplant (Photo credit: Wikipedia)
Eggplants belong to the nightshade family of vegetables. Some of their family members also include tomatoes, sweet peppers, and potatoes. Eggplants grow in a manner much like tomatoes, hanging from the vines of a plant that grows several feet in height and has big leaves to protect the vegetables from the sun.

There are hundreds of varieties of eggplant, and while the different varieties do range slightly in taste and texture, one can generally describe the flavor as having a pleasant deep and musty taste and spongy texture. They are available in your local market year-round, but they are at their peak between August and October. Check your farmers markets for the best and freshest eggplants if you can.

History

Thomas Jefferson, who used eggplant in many of his experiments, is credited with introducing eggplant to North America. Before then, the ancient ancestors of eggplant grew wild in India and were first cultivated in China in the 5th century B.C. For centuries after its introduction into Europe, eggplant was used more as a decorative garden plant than as a food.

Although it has a long and rich history, eggplant did not always top the list of favorite veggies. Before domestication and cross-pollination, eggplant was extremely bitter and had to be cooked very well to even begin to dilute the taste. The majority of eggplant we see in stores today is grown in Florida since the weather stays mild most of the year. But New Jersey, during the summer months, is also a major supplier of fresh eggplant to  produce markets. It grows pretty well throughout the United States, so you can most likely find it fresh at local farmers markets almost anywhere during the late summer months.

Health Benefits

Eggplants are extremely versatile in the kitchen and they also have several health benefits. Studies have been done on eggplant to find their deep purple skin contains an anthocyanin phytonutrient called nasunin. Nasunin is a water-soluble antioxidant (which means that it breaks down easiest when in water) and free radical scavenger that has been shown to protect cell membranes from damage. This becomes especially important in brain cell membranes which are mostly made up of lipids and are responsible for protecting the cell from free radicals and letting nutrients in and wastes out.

English: Three varieties of Eggplant
Three varieties of Eggplant (Photo credit: Wikipedia)
Fun Fact

Another name for eggplant is Aubergine, which describes the rich purple color. You may also hear eggplant referred to as a fruit, which is accurate since that is its botanical classification. Even more confusing is eggplant is also botanically classified as a berry.  And, if that's not strange enough, the seeds you see when you scoop out the inner pulp are edible, but you may not want to eat them when you hear they contain nicotinoid alkaloids. Sound familiar? Eggplant is closely related to tobacco, although the seeds are not addictive!

How to Eat

It is important to use a stainless steel knife when cutting eggplant to avoid the brown look from oxidization when using a carbon steel knife. This browning or oxidization happens fast, so only cut it when you're ready to prepare it. While eggplant can be eaten with the skin on or off, for larger fruits the peel may be tough, and  it is important to “sweat” the eggplant by slicing and salting it. This will draw out some of the water and, surprisingly, a lot of the bitter taste that goes with it.

Once you have the eggplant sliced and sweated, you can add it to just about any dish you want. A classic dish of Eggplant Parmesan is always a family pleaser.  A great middle eastern snack is babaganoush which is pureed roasted eggplant. Serve it with some toasted pita chips and you have one incredibly yummy snack. It also absorbs the flavors of the ingredients it is cooked with, and when cooked well it tends to disintegrate so it is a great way to incorporate extra vegetables into sauces without the kids even knowing!

If you haven't tried eggplant yet, now is the time! This time of year it is cheap and plentiful. That gorgeous color is enough to make you fall in love at first sight.  But the versatility will keep you a fan for life.

Still not sure how to use this unique vegetable? Be sure to check back later this week for some tasty eggplant recipes!

Enhanced by Zemanta

Friday, August 23, 2013

Campfire Recipe: Fire Fried Trout With Lemon Mustard Sauce

There's nothing more satisfying than settling down to a meal that you not only prepared, but caught yourself! If you like to fish, this is a great way to prepare your fresh catch over the campfire. Just bring along a cast iron skillet and a couple of everyday ingredients that will elevate your catch from the simple to the sublime, then revel in the results of your skills as a hunter - and a chef! :-)

Fire Fried Trout With Lemon Mustard Sauce
(Serves 4.)

Trout fillet
Cleaned trout. (Photo credit: Wikipedia)
Ingredients:

4 fresh trout, cleaned and patted dry
1/3 cup milk
1/2 tsp salt
1/2 cup flour
3 Tbsp oil for frying
3 Tbsp butter for frying
2 Tbsp butter for sauce
2 tsp Dijon mustard
1 tsp parsley flakes
2 Tbsp lemon juice

Instructions:
  1. In a shallow pan, mix together milk and salt.
  2. In another shallow pan, put the flour.
  3. Dip the trout first in the milk, then dredge in the flour; set aside.
  4. Put the skillet over fire, add oil and the butter for frying and heat skillet until it sizzles.
  5. Add trout to hot pan and fry until crispy and flaky; remove fish from skillet to platter.
  6. Add the remaining 2 Tbsp butter to skillet to make sauce, stirring in the mustard, parsley flakes, and lemon juice, letting the mixture come to a boil, stirring constantly.
  7. When sauce has thickened a bit, remove the skillet from the fire.
  8. Pour sauce over the trout and serve immediately.

Enhanced by Zemanta

Wednesday, August 21, 2013

Recipe: Slow Cooked Campfire Pot Roast In A Bag

Relax under the stars and let the delicious smells of this easy meal roasting on the coals stoke your appetite. Like a traditional pot roast, but more fun, the beef and vegetables will form their own rich gravy inside the foil pouch, and you'll dine like a gourmet no matter where you are! And if you just want to bring the campfire to your backyard, this one works great on a regular grill as well.

Slow Cooked Campfire Pot Roast In A Bag

campfire
Hot campfire (Photo credit: Murky1)
Ingredients:

1 pkg onion soup mix
1 cup water, heated
2 tsp flour
1 beef roast (3 lbs)
1 small onion, peeled in cut into quarters
3 carrots, peeled and cut into 2 inch chunks
4 medium red potatoes, washed and each cut into quarters
2 stalks celery, cut into 2 inch chunks
salt and pepper to taste
Large heavy duty foil cooking bag

Directions:
  1. Put the onion soup mix in a bowl and pour in the hot water, stirring until the soup mix dissolves; set aside.
  2. Sprinkle the flour into the foil bag and shake around. Put the roast in the bag and shake it around to coat well.
  3. Add all the veggies to the bag and shake again.
  4. Pour the onion soup from the bowl into the foil bag. Add salt and pepper to the bag if you wish, but remember the soup mix has salt in it already.
  5. Seal the bag tightly by folding it over several times.
  6. Put the bag, open side facing up, on a grate over a campfire over medium coals or on a grill over medium heat.
  7. Cook turning once or twice (keeping open side up) for 1 1/2 to 2 hours, depending on the heat of the coals.
  8. If you want you can use instead an 8" x 8" heavy duty aluminum foil cooking pan and just seal the pan with aluminum foil.

Enhanced by Zemanta

Monday, August 19, 2013

Campfire Cooking Basics From Setup To Cleanup

Before summer camping season winds down, try a new type of cooking experience that's fun for the whole family. If firing up your gas or charcoal grill at home is your ultimate cooking experience, you haven't tried cooking over a campfire yet!  Cooking over a true open flame is similar to grilling out, but more authentic and thrilling.  Imagine roasting marshmallows and making S'mores as the fire roars. Then, as the flame slows down and forms glowing embers, it's time to throw your meal on. The smoke and flavor from the wood you use acts like a giant hug to whatever food you are about to enjoy. You can almost taste it already, can't you?

Closeup of a campfire
Campfire (Photo credit: Wikipedia)
But, before you get started, there are a few basic things you need to know about how to cook over an open campfire. Once you learn the basics you'll be ready to throw a feast of delectable campfire delights together in no time.

Fire Up, Burn Down

In order to have a great campfire cooking experience, it is important to let your wood or coals get as hot as possible before you try to cook on them. The importance of waiting for the fire to burn down and the embers to start glowing is all of the kindling and starter have burned away.  This means you don't get the nasty newspaper smoke or pine needles smoke on your food while cooking.  If you want to eat sooner, use less material or cleaner kindling to get your fire going initially. The sooner it burns off, the sooner you can begin cooking.

Methods of Cooking

There are a few different methods to cooking over an open fire. Let's take a look at four of the most common ways:

1. Direct heat and aluminum foil - Wrap food such as meat and vegetables in a double layer of heavy-duty aluminum foil. Place the foil package on a bed of slow embers or coals. You can surround the package with a few more embers for more even cooking.  Allow to cook for 15 to 20 minutes, more or less depending on the food in the packages, and you have a delicious meal in a pouch.

2. Direct heat and long skewers - Place food such as hot dogs on skewers or prongs and roast them over the fire. This can work well with kebabs as long as the pieces are cut in appropriate sizes so they all cook at the same time.  Meat would have to be smaller than a piece of pineapple, for instance.

3. Metal grate - Place a metal grate, such as you have on your grill at home, over the campfire and cook as you would over your grill.  Adjust the height of the grate and the distance from the embers by arranging large rocks or logs to hold the grate up. Then the embers are glowing underneath the grate so you can perfectly cook that dinner.

4. Hanging racks - Construct, or buy, a tripod or rack and put it over the fire. Now you can hang pots from it or even hang a grate.  Many are adjustable so you can arrange the food to cook at the time and temperature you desire.

Deutsch: Jungen der Waldjugend kochen auf der ...
 (Photo credit: Wikipedia)
Cleanup

When cooking on a campfire in the great outdoors, the option of leaving the dishes go until the morning is just not available.  Bears and other predators can smell food and will come exploring to find it.  In order to keep your campsite safe, it is important to keep your fire and food at least fifty yards from your tent and to keep your cookware and dishes clean.  You can clean cookware by placing a grate over the fire and filling two metal pots with water. When one is warm, remove it from the fire, add soap and wash dishes. When the other pot of water is hot, place soapy dishes in a mesh bag and dip into the hot water several times. Dry with towels, paper towels, or hang to air dry.  Put ALL the food into closed containers and store safely away from your tents.  Save your dishwashing water for the next step.

When you are ready to turn in for the night, don't just kick a little dirt on the fire and go to bed.  Instead, take your dishwashing water and extinguish the fire with it when you are through. Stir the fire around and add more water if necessary, until you see every ember go out.  Now, shovel dirt over the top and stir again.  Remember:  “Only YOU can prevent forest fires.” - Smokey The Bear.

With a little preparation and the right tools, you can have a wonderful cookout at your campsite while enjoying the great outdoors!

Enhanced by Zemanta

Friday, August 16, 2013

Recipe: Cold Quinoa Green Bean Salad

Cold summer salads are one of my favorite ways to eat quinoa. The uniquely crunchy texture provides a nice change from other summer salad options, and the mild flavor goes well with just about any summer veggie and light tangy dressing. This is a variation on one of my other favorites - using green beans instead of cooked black beans. It makes a great lunch or light supper, and lends itself well to all sorts of creative tweaks and additions - have fun, and enjoy!

Cold Quinoa Green Bean Salad with Tomatoes & Feta
(Serves 1.)

Ingredients:

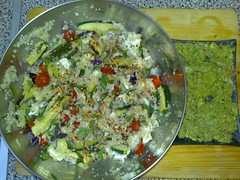
Quinoa salad
Quinoa salad (Photo credit: markhillary)
For the salad:
1 cup quinoa
9 ounces runner beans (cut off tops and tails, then cut in narrow diagonal strips)
10 1/2 ounces cherry tomatoes (wash tomatoes and cut in quarters)
7 ounces feta cheese
One handful pumpkin seeds (toast in a dry skillet for a minute or so to prepare)
black olives to taste, roughly chopped

For the dressing:
juice from one medium-sized lemon
1 1/2 tbsp balsamic or red wine vinegar
2 tbsp olive oil
salt and black pepper, to taste

Directions:
  • Toast quinoa in a pan over medium-low heat until quinoa just starts to change color.
  • Stir in three cups hot water and a pinch of salt. Allow to simmer for about 12 minutes, until quinoa is almost tender and white tails start to appear. 
  • Add beans, then cover pan and allow to steam for two minutes. Water in the pan should be completely absorbed and the quinoa grains light and fluffy. Remove from heat and allow to cool.
  • To make the dressing, mix lemon juice, oil, and balsamic or red wine vinegar together. Add black pepper and salt as needed.  Set aside.
  • Finally, add olives, tomatoes, and most of the pumpkin seeds to the quinoa and beans.
  • Drizzle dressing over this mixture and crumble in the feta cheese. 
  • Top with remaining pumpkin seeds and serve immediately.

Enhanced by Zemanta

Wednesday, August 14, 2013

Recipe: Easy Morning Quinoa

Start your day off right with this easy and tasty dish full of protein, fiber, and flavor. It will fill you up and keep you from being hungry until lunchtime - no snacking needed! Even the kids will like the mild flavors and sweetness of the dried fruit - especially if you tell them this is porridge the Three Bears ate for breakfast! :-)

Easy Morning Quinoa
(Serves 3-6)

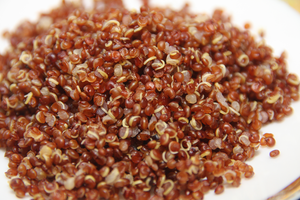
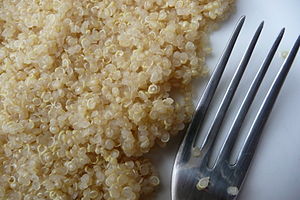
English: cooked red quinoa
Red quinoa (Photo credit: Wikipedia)
Ingredients:

1/2 cup dry quinoa, rinsed well
1 1/2 cups whole milk or rice milk
1 cup chopped apricots
1/4 tsp vanilla extract
2 tbsp golden raisins

Directions:
  1. In a medium saucepan, combine quinoa and milk and bring to a slow simmer over medium heat, cover and cook for fifteen minutes until quinoa is tender. Stir in vanilla, apricots, and raisins.
  2. Transfer about 1 1/2 cups of quinoa mixture to a blender and purée.
  3. Return this puréed mixture to the pan and stir well to mix. 
  4. Serve immediately or chilled as desired. 
  5. Yields six 1/2 cup servings.

Enhanced by Zemanta

Monday, August 12, 2013

The Hot And Cold Guide To Eating Quinoa

Quinoa can be eaten either hot or cold and enjoyed thoroughly either way. No matter which way you decide to feast, quinoa is a delicious and nutritious addition to your meals. Since there are endless ways to enjoy quinoa, it should become a staple in your kitchen.  Both the versatility and the health benefits are reasons to keep a pantry full of this delicious seed. Let's take a look at some of the best hot and cold ways to enjoy this delicious ancient food.

Hot

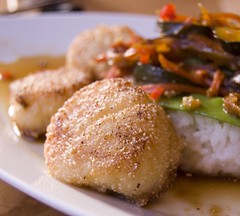
Main Course: Quinoa-Crusted Scallop
Quinoa-Crusted Scallop (Photo credit: ulterior epicure)
Everyone loves a hearty, hot dinner. And while quinoa can be substituted in just about anything where rice is involved, it is also a great food that has its own merits as the main ingredient of a meal. One of the best ways to enjoy hot quinoa is in the morning for breakfast. Quinoa can be made in much the same way as a hot cereal. After cooking, add in some brown sugar or honey, and milk or cream, and even fresh or dried fruit to get your day off to a great start.

You can easily take quinoa into dinnertime with a jambalaya dish with tomatoes, sausage, shrimp and spices. Cooked this way, it does replace rice, but is also the main focus of the dish as the tomatoes and protein are additions for added flavor.  Another application for a hot meal includes using quinoa to bake with. Now this can be either the regular fluffy cooked quinoa or quinoa flour or quinoa meal. Quinoa flour is often used as a substitute for regular wheat flour.  But quinoa meal can can be used for a grainier, heartier product while the fluffy, cooked quinoa is perfect to add to muffins and breads to add a nice, light texture; and lots of nutrition, too.

Français : Quinoa cuit.
 (Photo credit: Wikipedia)
Cold

There are some delicious recipes for hot quinoa, but the cold recipes are just as incredible. The versatility and qualities that quinoa brings to cold dishes is almost unmatched in the culinary world. With chilled quinoa, you can travel around the world and back again without ever leaving your house. From a stuffed grape leaf to a sweet cucumber Thai salad, your possibilities are endless. A great buffet or potluck suggestion would be to have cold quinoa and a variety of ingredients available so guests could create their own unique culinary experience.

Cold desserts like quinoa pudding (similar to rice pudding, but with quinoa, of course) is a great cold application for quinoa. Some chefs are experimenting with using quinoa in their sushi and other traditional Asian dishes as well as smoothies and blended juices. With the amount of protein packed into the tiny seed, it is no wonder people are substituting quinoa in so many of their favorite dishes and drinks.

Yummy Experiments

No matter if you like quinoa hot or cold, you have plenty of options. One of the best ways to explore new uses of quinoa is to play around with it by adding some to your current favorite meals. Not only will your dishes get a new kick, you may actually stumble onto the next “Chicken and Waffles” combination and become famous!  But, really, quinoa is just plain yummy.  Grab a bag or box and start experimenting with quinoa today.

Enhanced by Zemanta

Friday, August 9, 2013

Recipe: Lemony Herbed Shrimp Kabobs

This is a super easy and tasty recipe great for summer grilling! Fresh lemon zest, herbs, and honey combine to give the shrimp a punch of flavor and character. Add your choice of vegetables to the skewers, such as zucchini, summer squash, sliced bell peppers, etc., for a full meal. Check it out for your next barbecue or pop it on the grill for a quick, light, weeknight dinner.

Lemony Herbed Shrimp Kabobs
(Serves 2-3 as a main dish.)

Shrimp kebobs on a charcoal grill...!
Shrimp kebobs on a charcoal grill. (Photo credit: ddkkpp)
Ingredients:

1/4 cup green onions, chopped fine
1/4 cup olive oil
2 tsp lemon zest
2 tbsp fresh lemon juice
1/2 cup honey
3 tbsp fresh parsley, chopped
2 tbsp fresh thyme leaves, chopped
1/4 tsp salt
1 lb. shrimp, peeled and de-veined

Directions:
  • Whisk together all ingredients (except shrimp) in a glass or plastic bowl, then add shrimp and gently toss to combine.  
  • Cover and refrigerate for at least one hour.
  • Prepare your grill or broiler.
  • Remove shrimp from marinade, discard marinade, and put shrimp on metal or water-soaked bamboo skewers.
  • Grill for 5 to 7 minutes, turning once during cooking time, until shrimp are cooked through and pink. (This can be a main dish for 2 to 3 people or appetizers for more.)
Enhanced by Zemanta

Wednesday, August 7, 2013

Learn to Enjoy The Zest Of Citrus In Your Cooking

Zest is a funny word.  We can use it in many ways.  Is zest a noun or a verb?  Let's take a look at the essence of zest, what it can provide in the kitchen, and some techniques for gathering this tricky little super-flavor.

What Zest Provides

Using an orange zester to zest an orange.
Using an orange zester to zest an orange. (Photo credit: Wikipedia)
The outermost rind of citrus is where you find zest for cooking. It is valued for the intense, fresh, and brightening flavor it imparts to food. That is thanks to an abundance of aromatic oils in the rind.
However, there is a sub-rind, also known as the pith, which is white in color and directly under the rind. This pith is very bitter and not desirable at all when it comes to cooking. The pith serves only one purpose; to help protect the fruit from predators.

Citrus zest is added in recipes to either add color, intensely strong flavor, or both. There are a number of methods and tools available to harvest the fruit’s zest. You can purchase dried zest in the spice section of the supermarket, but it doesn't hold a candle to the fresh zest you can easily make yourself.

Zesting Techniques

Before starting, be sure to scrub the fruit with a vegetable brush and warm, soapy water. This will help remove any chemicals or other contaminants which may be on the skin. Rinse very well under fresh, cold running water, then dry.

You want to remember when 'zesting' citrus, to be very careful about only zesting, or scratching off, the colorful outside layer. If you start getting into the pith, you have gone too far.

If you are using a traditional hand held zester, you will end up with long, skinny stands of zest. A traditional zester looks almost like a miniature back-scratcher. You can also use a pairing knife, but you will have to be incredibly careful only to get the colorful part of the zest and not the pith. If you don't have a zester or micro-plane grater as listed below, a better choice would be a sharp vegetable peeler - with a careful hand, you can get perfect thin peels of lovely zest. You will probably need to mince or chop them up afterward though.

This is a citrus zest grater (may also be used...
A citrus zest grater (may also be used as a general purpose grater). (Photo credit: Wikipedia)
A micro-plane grater is basically a very fine hand held grater which can be used to produce finely grated zest. To use a micro-plane, simply rub the lemon or other citrus fruit against the small blades on the grater over a bowl. A micro-plane produces short pieces of zest which are ready to use without further chopping.

Of course, if you only have an old fashioned box grater, the type you know from grating cheese, you can zest citrus on that as well.  Just try the different grater levels and decide which works best for you.  There are times when you might want larger curls of zest and times when you want the zest to be tiny enough to be absorbed into a recipe.

When to Use Zest

Zest is a powerful ingredient you will want to get to know in the kitchen.  A little goes a very long way, so you have to know when to use zest.  So when should you use zest?  Your answer is easy – whenever you want to infuse a dish with incredible layers of citrus flavors.

For example, by folding a little citrus zest into ricotta cheese before making baked ziti or stuffed shells, you get a tangy note that works well with the pasta. Putting lemon or lime zest into olive oil and heating it just until it begins to sizzle will give you an incredible infused olive oil suitable for many uses. You can also mix zest with brown sugar or honey to use as a glaze.  Or, try stirring zest into cake or brownie batter for a surprising flavor 'pop' in your favorite dessert!

Zest is an incredible ingredient to lift and brighten many dishes.  Considering that we used to just throw the lemon or lime or orange rind away, this is an ingredient that is like 'found money'... or I should say 'found flavor!'  Enjoy the zest of citrus to add more zest to your meals.

Enhanced by Zemanta

Monday, August 5, 2013

Beat the Heat With Cool & Fresh Citrus Summer Beverages

Nothing says summer like a nice cold citrus drink. Maybe it's because the citrus flavors just scream “Summer's here!”  Or perhaps it's because of the clean and refreshing taste.  No matter what the reason, summer and citrus go hand-in-hand with a warm summer night. So sit back and relax with these mouthwatering drinks that feature citrus at its finest.

Refreshing Drinks for All Ages

These drinks have no spirits, but they have lots of 'spirit!'  (If you prefer the adult version, simply add alcohol of your choice - or see more recipes below.) They are easy to make, and very tasty.  With these recipes, you will never go back to processed powdered or canned drinks again.

I looked on the previous shoot for a long peri...
Limeade. (Photo credit: Wikipedia)
Limeade

This is one of the all time classics when it comes to summer.  Limeade is a sweet and tart drink that not only refreshes, but makes a sunshine-drenched day even better.  If you're looking forward to making a giant batch of limeade to share with your friends and family, this is a super simple method.

Juice four to six fresh ripe limes, then combine with one liter of lemon-lime seltzer water, which can usually be found on the soda aisle of your local grocer.  Add in some superfine (castor) sugar to taste. Once you have everything mixed, throw some ice in a glass and fill it up with this over the top refreshing concoction.

Lime Sherbert Punch

Looking for something fun the kids can enjoy on a hot summer day? How about a lime sherbert punch? Not only does it taste great, the green foamy drink makes for a pretty amazing party drink when the neighborhood decides to stop by for some fun in the sun.

Grab a big bowl and combine a quart of lime sherbert, one liter of ginger ale, a can of sliced pineapples including the juice, and sliced rounds of lemon and lime. So pretty and so delicious.

Sparkling Italian Lemonade

Not your average lemonade, this drink is a basil-infused lemonade that will knock your swim-floaties off!  There are certain flavors that play off each other, and lemon and basil are two of them. You won't ever go back to a plain old lemonade once you try this.  But, before you get too far, you'll need to make the simple syrup.  Don't worry; it's simple just like the name says.  In a saucepan, put two cups of sugar, one cup of water, and a handful of washed and chopped fresh basil leaves. Over medium heat, cook this until the sugar melts and the liquid reduces just a bit. Then set aside and let the syrup cool.

To make the lemonade, take about 12 to 15 lemons and juice them.  You want about two cups of freshly squeezed lemon juice.  Put the juice into a pitcher and add in two cups of the basil infused simple syrup - or to taste. Then pour in two cups of sparkling water, add ice as desired, and serve immediately.

Refreshing Drinks for Adults

These are the 'spirited' drinks meant for adults.  The freshness of the ingredients make these adult drinks stand out from the rest.

Mimosa Punch

English: Canadia-style Shirley Temple: "B...
Citrus Punch. (Photo credit: Wikipedia)
As the dew rolls off the freshly cut grass, there is no more delightfully refreshing drink than a tall flute of mimosa punch. Mimosa punch is easy to make and even easier to drink at a brunch with your friends and family. Grab a can of orange juice concentrate, a bottle of club soda, and a bottle or two of sparkling wine or champagne.

Combine the thawed orange juice and about four cups of ice cold club soda and stir until they are well mixed. Once those two ingredients are together in a punch bowl, start adding the sparkling wine or champagne to taste, pour into flutes and serve with a fresh twist of orange and a sprig of mint.

Lemon Cucumber Gin Punch

Can you really combine something fun, something refreshing, and something healthy?  That sounds like the perfect drink for summer.  Of course gin is not considered healthy, but the lemon and cucumber are so cleansing, it's hard to not give this drink a little nod to healthy cocktail status.

Simply combine the juice of four lemons, along with the rinds, cut up a bit, into a bowl.  Add about a cup of sugar, more or less as desired. Let this 'steep' for about half hour to one hour, then strain, discarding the rinds.  Slice a large washed and unpeeled cucumber into thin rounds and put them to a pitcher.  Pour in the strained lemon juice.  Then pour in a full bottle of gin and let it steep for two hours. To serve, fill a tall glass with ice and pour punch into glass.

Whether you have a brunch planned at your house, or a pool party, or picnic, a refreshing citrus drink just fits.  Summertime is the right time to enjoy these fresh, cooling beverages.  Tweak them as you wish to suit your taste, then sip and relax!

Enhanced by Zemanta

Friday, August 2, 2013

Recipe: Tomato Basil Garden Tart

Impress your dinner guests with this amazing and easy recipe using fresh tomato and basil from the garden or farmer's market. If you're feeling really ambitious, make your own fresh ricotta - it's actually quite easy, and tastes WAY better than any you can buy! This one gives you gourmet taste, without too much work, and incorporates the best of your summer garden into your meal.

Tomato Basil Garden Tart
(Serves 6-8 as an appetizer.)

Tomato slices
Tomato slices (Photo credit: Wikipedia)
Ingredients:

1 frozen pie crust, thawed
1/2 cup finely grated Asiago cheese, divided
1/2 cup cottage cheese (or ricotta)
10 to 15 fresh basil leaves, divided
1 tsp black pepper
1/4 tsp salt
4 large ripe tomatoes, halved, seeds removed, and sliced thinly

Directions:
  • Preheat oven to 375 degrees.
  • Roll pie crust out to be about 2 inches larger in diameter than your tart pan. Place in tart pan, pulling extra crust up the sides of the tart pan; trim off any extra. 
  • In a small bowl, put half the grated Asiago and all the cottage cheese, the black pepper and salt, and stir to blend.
  • Finely chop the basil leaves and add to the cheese mixture, stir to combine. 
  • Spread 1/2 of the cheese-basil mixture over the bottom of the pie crust in tart pan, top with half the tomato slices, arranging evenly.
  • Spread remaining cheese-basil mixture on top of tomatoes, and top with remaining tomatoes, again arranged evenly.
  • Bake in preheated oven for 20 to 25 minutes.
  • Remove the tart from the oven and sprinkle the remaining Asiago cheese evenly over the top, then return to oven and bake an another 5 to 10 minutes or until cheese is melted and golden brown all over and crust is baked thoroughly.
  • Remove and let cool slightly before serving.
Enhanced by Zemanta