Wednesday, August 31, 2011

Recipe - Quick & Easy Caramelized Beets

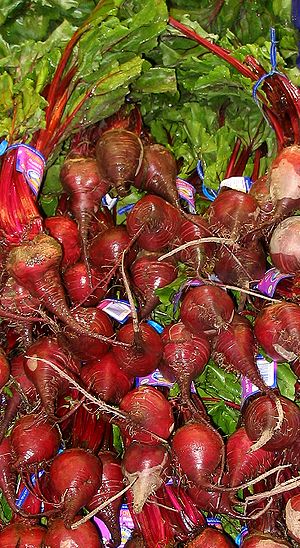
Okay, I know what you're thinking - beets??  Who eats those?  Actually Beetroots at a grocery storeImage via Wikipedialots of people do. Not only are they tasty, but they are absolutely FULL of amazing nutrients, vitamins, and antioxidants. Plus they are pretty! :-)

If you are a member of a CSA, you've probably gotten some beets in your share at some point. We get them so often that even though I really like them, sometimes I am at a loss for what to do with them. They are quite tasty baked, but they take a long time to cook, and I don't want to heat up the house by running the oven for an hour (or more) in the summer. Sometimes I make refrigerator pickles with them, but it's a bit time consuming, and you have to wait a few days to eat them. Often I resort to just steaming them, which is fine, but they are a bit bland.

Here is a REALLY easy recipe I came up with the other day. Not only was it super-simple, it also tasted so amazing, this is now my new favorite way to cook beets!  (I let a friend at work try one, and he was so impressed, he said even his kids would probably like them.)

Quick & Easy Caramelized Beets:

Ingredients:
3-4 large beets (or 5-6 medium)
2 TB butter
1/2 tsp dry ground mustard
1/3 tsp sea salt (or to taste)
1/4 tsp fresh ground black pepper

Directions:
  1. Wash beets well, scrubbing all over with a vegetable brush. 
  2. Trim off root end and discard. (You may peel if desired - I just scrubbed well, and peeled off a couple of "scruffy" looking spots, but left the rest of the peel on.)
  3. Slice in thin, uniform slices, about 1/4" thick. Discard stem end.
  4. Melt butter in large heavy-bottomed skillet over medium heat, until hot.
  5. Add beet slices, stir well, and cover tightly. Lower heat to medium-low.
  6. After about 5 minutes, remove lid, stir well, and add mustard, salt, and pepper.
  7. Cover and continue to cook about 15 more minutes, stirring well every 5 minutes or so. If they seem to start to get dry, or stick, add a few drops of extra virgin olive oil.
  8. When done, beets should be very tender, and may be starting to caramelize around the outer edges. Taste and adjust seasonings if needed.
  9. Serve hot. 
Makes a good side-dish for stuffed squash or zucchini, grilled meats, steak, or just about anything else!

Caramelized Beets & Stuffed Patty Pan Squash
Enhanced by Zemanta

Monday, August 29, 2011

Recipe - Summer Berry Breakfast Smoothie

For nearly the past 10 years, throughout the summer, I have smoothies for breakfast almost every day. I got into the habit when I lived in Texas, and the bounty of fresh fruit was nearly continual (I often had smoothies year-round there). After I moved to Ohio, fruit was less plentiful, but still abundant in the summer, so this became my summer routine. As are most of my "recipes" that I have come up with myself, measurements are merely figurative, and ingredients can vary widely.

Summer berries.Image via WikipediaBelow is a basic idea of my "typical" summer breakfast, but feel free to make your own additions, subtractions, and substitutions, and adjust quantities as desired. I use different types of berries on a regular basis, or sometimes combine several. Before peach season, I leave out the peach and add more berries. Depending on the size and amount of the fruit used, this can make anywhere from 2 1/2 to 4 cups, but usually runs right about 20 fl oz, or just under 3 cups. You can also use frozen fruit (I often use a combination of fresh and frozen - e.g. fresh banana and peach with frozen berries.) - I will often stock up on berries when they are on sale, and wash and freeze them in ziplock bags so I can easily pop them in smoothies later.

For those who want more bulk to their breakfast, you might try adding flax or chia seeds, protein powder, or more coconut oil. I am not big on breakfast anyway, and sometimes it is all I can do just to drink the whole thing, so this is plenty for me, and I don't get hungry until right around lunchtime.

Summer Berry Breakfast Smoothie (serves 1 -- or 2 small eaters)

Banana, peach, and strawberry.
Ingredients:
1 ripe banana
1 ripe peach
5-6 large ripe strawberries
1-2 handfuls blueberries or blackberries (optional)
6 oz plain yogurt (I use my own home-made, from fresh, non-homogenized milk I get in my CSA share)
1-2 TB honey or agave sweetener
1 TB organic extra-virgin coconut oil (or more, as desired)
1 TB chia seeds (optional)
6 oz fruit juice (I have used everything from orange to grape, but my favorite is orange-pineapple combo)

Directions:
  • Peel banana, break into sections, and place in bottom of blender or food processor.
  • Wash peach well, cut into segments, and place on top of banana.
  • Wash berries well, remove stems/hulls (if applicable), and add to container.
  • Add yogurt, honey, coconut oil, chia seeds (if using), and juice. Add more juice if desired. I like to add juice just until it fills up all the air holes in the container, but doesn't cover the fruit entirely.
  • Blend/process until smooth (I use a nifty contraption called a Ninja - which I LOVE! It is much faster, neater, and easier to clean than a blender. Plus it's not as noisy, and does a better job - you don't have chunks left over like some blenders leave behind in the bottom.)
  • Pour into a glass and drink immediately. (These don't seem to taste very good after refrigeration - you need to prepare right before drinking. I haven't tried freezing them, but might be tasty.)
Let me know what you think, and feel free to suggest your own additions below!
Enhanced by Zemanta

Friday, August 26, 2011

Recipe - Peachy Heirloom Tomato Salad with Blue Borage Blossoms

Here is a true gourmet summer treat!  This delicious recipe combines interesting ingredients to make an unusual taste treat combination - and a gorgeous color palette! Give it a try, and let us know what you think.

Peachy Heirloom Tomato Salad with Blue Borage Blossoms
Balsamic vinegar, red and white wine vinegarImage via Wikipedia(Serves 4-6)

Ingredients:

1 lb ripe fresh peaches
2 lb. vine ripened heirloom tomatoes
3 green onions, cut into thin strips
2 Tbsp light olive oil
2 Tbsp freshly squeezed orange juice
1 Tbsp balsamic vinegar
1 tsp soy sauce
1/2 tsp orange zest
1/4 tsp kosher salt
1/4 cup fresh mint, chopped
1/4 cup fresh basil, chopped
1/2 cup blue borage flowers, whole

Directions:
  1. Clean, core, and chop the tomatoes roughly. If your collection of heirloom tomatoes includes small (cherry size) tomatoes, just cut in half.  Mix up the way you cut them so everything isn't the same. Put in large salad bowl.
  2. Scrub the peaches and slice into small wedges (removing the pit and stem as you do.) Add to the salad bowl with tomatoes.
  3. Add the thin strips of green onion to the salad bowl.
  4. Now make the dressing:
    • Whisk together the olive oil, orange juice, balsamic vinegar, soy sauce, orange zest, and salt until smooth and frothy.  
    • Pour this dressing over the salad, sprinkle in the mint and basil and toss to combine.
  5.  Set the salad aside for 10 minutes; taste and add salt if necessary.
  6. When seasoned properly, Serve in individual salad bowls, sprinkling the blue borage flowers over each serving.
Enhanced by Zemanta
More Tasty Gourmet Recipe Ideas:
    

Wednesday, August 24, 2011

Recipe - Broiled Garden Tomato Basil Salad

If you're a tomato lover like me, this one will have you drooling just reading the recipe!

Broiled Garden Tomato Basil Salad
tomatoesImage by Alaina B. via Flickr(Makes 8 individual salads.)

Ingredients:

4 large sweet beefsteak tomatoes
olive oil
1/2 tsp kosher salt
1/4 tsp freshly ground black pepper
1/4 cup fresh basil, coarse chopped
8 fresh baby mozzarella balls, cut into small pieces
4 strips bacon, diced and crisp fried, drained

Directions:
  1. Wash and cut the tomatoes in half across the 'equator' and carefully cut out the insides, chop up and put in a bowl.
  2. Add to the bowl with the tomato pulp, the kosher salt, black pepper, basil, and mozzarella balls pieces. Mix to combine.
  3. Place each tomato 'bowl' cut side up on a broiler pan and brush lightly with olive oil.
  4. With slotted spoon, fill the bowls with the tomato-basil-mozzarella mixture, making sure you don't get too much tomato juice in the tomato bowl.
  5. Place under preheated broiler at 5" away for about 3 to 4 minutes or until tops brown, tomato softens, and cheese is melted.
  6. Remove and let cool slightly.
  7. Sprinkle crumbled bacon on top and serve warm.
Enhanced by Zemanta

More Scrumptious Tomato Recipes:
   

Monday, August 22, 2011

Turn The Humble Garden Tomato Into A Gourmet Salad Star

When new gardeners start plotting out their garden, typically the first harvest they envision is the tomato.  Yes, the good old tomato ranks first among all the vegetables we imagine in our dream gardens.  Why is that?  Because the garden tomato is not only easy to grow, but freshly picked, is one of the tastiest of all vegetables.

State fruit - TomatoImage via WikipediaHowever, tomatoes have often been thought of as the 'blue collar' vegetable – good, but not gourmet.  But even a good old fashioned tomato can produce culinary brilliance when treated with a little imagination.

A Little Background

The tomato wasn't always so beloved or accepted.  At one point, the tomato was considered suspect, even poison.  However, as the tomato traveled from South America, to Central America, to North America, and then into Europe, this fruit (yes, the tomato is a fruit) kept gaining favor.

This unsuspecting treat started out as a tiny, gnarly, even wild fruit.  Growers have been developing hybrid tomatoes ever since, creating bigger, smoother crops.  However, during this hybrid process, we've lost much of the flavor of the true tomato. 

Growing your own tomatoes can help you get back to the basics;  a sweet, firm, flavorful tomato.  Once you get closer to the tomatoes that the Aztecs worshiped, you'll enjoy flavors that will have you singing the praises of tomatoes as a gourmet treat.

Old Fashioned Favorite Takes Center Stage
Tomatoes are one of the more versatile veggies in the garden. It's sometimes difficult to think of tomatoes as gourmet, but it's time to rethink.  When you plant a tomato, you expect a fresh salad at harvest time, but perhaps you haven't given a gourmet salad much thought.  Most likely you've thought of the tomato as an addition to a green salad.  It's time to give fresh tomatoes a bigger stage on the family table.

Yes, tomatoes give a glorious boost to mixed greens in a salad.  But, as a central ingredient in salads, you can't go wrong with the bright colors and flavors of the garden grown tomato. There are so many ways to turn this simple side show into a headliner.

When choosing tomato plants or tomatoes at your farmer's market, choose heirloom tomatoes or home-style, not hybrid, tomatoes for the best of both worlds. These tomatoes don't look like the tomatoes you may be used to in the produce aisles, but the further you get away from hybrids, the better the flavor.

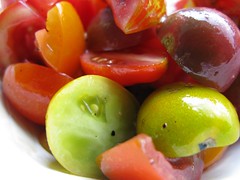
Heirloom tomato saladImage by mnapoleon via FlickrSimple ideas for fresh tomatoes can produce gourmet classics.  For instance, combine fresh diced tomatoes with prosciutto, baby mozzarella, fresh basil, and a drizzle of balsamic vinaigrette or even just a good olive oil, and you'll discover a salad that is bound to please even the most jaded gourmet.  Or skip all the other ingredients and cut up a variety of tomatoes of all shapes, colors,  sizes, and flavors for a surprising salad that's both simple and elegant. Splash with a mix of good olive oil and balsamic vinegar, a dash of kosher salt, and your choice of  herbs to give the tomato a chance to really stand out.

Another option is to use fresh tomatoes as a bowl or 'vehicle' for a crab salad, tuna salad, shrimp salad, smoked salmon, or other main-dish style salad for a special luncheon or light dinner.  Scoop the inside out of a large, sweet tomato, dice and combine with other fresh veggies, then fill the tomato 'bowl' and serve.

You can serve a hot salad with the same basic ideas.  Saute onions and mushrooms, then toss with chopped kale and dill, put inside the tomato bowl, top with shredded provolone or mozzarella cheese and set under the broiler just long enough to melt the cheese.  Now you have a wonderful hot salad, side dish, or luncheon favorite with unexpected flavors.

There is no end to the excitement a fresh garden tomato can elicit when combined with other imaginative flavors or when standing on its own fresh good taste.  The gourmet happens when you get creative and think way beyond the notion that a tomato is just a supporting actor in your salad.  Make it the star and taste the possibilities!

Check back Wednesday for some gourmet tomato recipe ideas....
Enhanced by Zemanta

Friday, August 19, 2011

Recipe - Strawberry Surprise Freezer Jam

To wrap up our week on the delicious topic of berries, here is a tasty way to preserve some for the colder months. Freezer jams are easy because they don't require an intensive canning process, and they will keep quite well in the freezer, and even in the refrigerator for some time. Often, like this one, the fruit is not cooked, which gives it a fresher taste, and also keeps the color vibrant. This one has a special and unusual ingredient that makes it a bit more interesting. Give it a try, and feel free to post your comments and suggestions below.

Strawberry Surprise Freezer Jam:

Strawberry jam step 7Image by Esalota via FlickrWhat You'll Need:
1 pt boxes of fresh strawberries, washed, drained and hulls removed
2 1/2 C of fresh pineapple, peeled and finely chopped
7 C sugar
2 pkgs (1 3/4 oz) powdered pectin
1 C cold water
4 pt freezer containers with lids

How to Make It:
  1. Place strawberries in a large mixing bowl. Crush the strawberries with a potato masher.
  2. Measure out 2 1/2 C strawberries and place in a separate bowl.
  3. Add the pineapple to the strawberries.
  4. Slowly add the sugar and stir until well combined.
  5. Place the cold water in a saucepan over medium heat.
  6. Add the pectin.
  7. Stir continuously until water begins to boil. Boil 1 minute. Remove from heat.
  8. Pour the water mixture into with the fruit.
  9. Stir well to combine. Continue stirring 4 minutes.
  10. Pour into the pint freezer containers and cover.
  11. Let stand at room temperature for 24 hours.
  12. Freeze after 24 hours.
Jam will stay good in the freezer for up to 6 months. To use, remove from freezer and allow to come to room temperature, about 1 hour. Cover and refrigerate for up to 3 weeks.
Enhanced by Zemanta
More Delicious Jam Recipes:
   

Wednesday, August 17, 2011

Video - Getting Creative with Berries

With all the great berries available this time of year, here is a fun video with some really creative and unusual ways to use different types of berries. This one will make your mouth water for sure!  (Click on the link to view the video.)

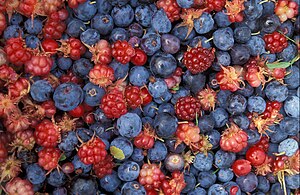
Alaska wild "berries" from the Innok...Image via WikipediaGetting Berry Creative (video)
It's berry season once again, and for those who may be looking for new recipe ideas to highlight the summer season, Chef Jacques offers up some berry creations.
Publish Date: 07/21/2011 3:00
http://cookingupastory.com/getting-berry-creative

Enhanced by Zemanta

Monday, August 15, 2011

Recipe - Marinated Berries on Fresh Baby Spinach

Here is a yummy summer salad recipe even the kids will love! A great way way to use fresh summer berries, with a tangy, spicy/sweet dressing, this one will make your mouth water, plus it's packed with vitamins and antioxidants.

Marinated Berries on Fresh Baby Spinach:

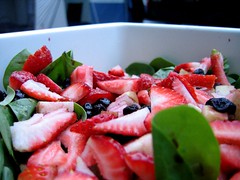
berry-spinach saladImage by goodmami via FlickrIngredients:
1 pint ripe strawberries, hulled and sliced
1 pint ripe blueberries, washed and dried
2 Tbsp red wine vinegar
1 Tbsp light olive oil
1 Tbsp light brown sugar
1 tsp poppy seeds
1 Tbsp minced shallot
1/8 tsp smokey paprika
1/4 tsp kosher salt
12 oz baby spinach
chopped walnuts
bleu cheese crumbles (optional)

Directions:
  1. Clean strawberries and blueberries and put in large bowl.
  2. Whisk together in a separate bowl the vinegar, olive oil, sugar, poppy seeds, shallot, paprika, and salt, until frothy - then pour over berries.
  3. Let berries marinate for 30 minutes, stirring frequently.
  4. Divide spinach between individual salad bowls. Spoon marinated berries and dressing/marinade over the top of each salad, then top with a sprinkling of walnuts and bleu cheese crumbles.
  5. Serve immediately.

More Tasty Salad Recipes:
   

Friday, August 12, 2011

Video - How to Make Zucchini Ribbons

Zucchini ribbons are great for salads and pastas - I love them in my favorite summery zucchini ribbon pasta salad. They are super easy to make, but in case you need a quick tutorial, here is a short video for you (and be sure to see below for some more tasty recipes!)

Cooking Tips : How to Ribbon Zucchini
Kitchen Tips: How to Ribbon Zucchini. Basic cooking techniques and tips for Ribboning Zucchini


Now here are a few fun ways to use your zucchini ribbons (remember to use small zucchini, so they will be tender and not seedy; you can mix cooked, drained fettuccini or linguine into any of these if you want more to make a whole meal out of it):

Zucchini Ribbon Salad - A Couple Cooks
Yes, there's the requisite zucchini bread – but how about zucchini ribbons? I was intrigued by the concept I'd seen in a few places, so we thought we'd give it a try. The basic idea is to cut zucchini into thin strips, ...
Publish Date: 08/01/2011 5:00
http://www.acouplecooks.com/2011/08/zucchini-ribbon-salad/

Meatless Monday: Summer Squash and Zucchini Ribbon Pasta ...
Summer Squash and Zucchini Ribbon Pasta. One year ago, if you asked me if the Meat-eating Military Man would ever eat a fresh vegetarian meal, I would have answered, “probably not.” If you questioned if the Meat-eating ...
Publish Date: 08/01/2011 8:00
http://meateatingmilitaryman.com/2011/08/01/meatless-monday-summer-squash-and-zucchini-ribbon-pasta-panzanella/

marys bites: Zucchini Ribbon Salad with Lemon Parmesan Dressing
Zucchini Ribbon Salad with Lemon Parmesan Dressing. For the hot summer nights this salad is truly amazing. The zucchini is so light and crunchy, the smoky pine nuts and that tangy lemon dressing with the small torn ...
Publish Date: 07/11/2011 14:23
http://www.marysbites.com/2011/07/zucchini-ribbon-salad-with-lemon.html

Enhanced by Zemanta

Wednesday, August 10, 2011

Recipe - Sweet and Sour Summer Squash Slaw

Here is a tasty summer salad recipe to help you use up some of those extra zucchini or yellow summer squash. As mentioned in Monday's article, be sure to pick the small ones for salads, as these are the most tender and easy to handle, and they won't be seedy or tough. This fresh summery version packed with fresh veggies will never let you think of slaw the same way!

Sweet and Sour Summer Squash Slaw

Ingredients:
4 tiny yellow summer squash
4 tiny zucchini
2 stalks celery, chopped
3 whole green onions, chopped
1/2 red bell pepper, chopped
1/2 green bell pepper, chopped

Dressing:
1/2 cup sugar
1/2 cup apple cider vinegar
1/4 cup light Olive Oil
1 Tbsp fresh dill
1/2 Tbsp fresh basil
1/4 Tbsp fresh thyme
1/2 teaspoon pepper
1/4 teaspoon salt

Directions:
  1. Scrub the tiny squashes well, trim off both ends, then take a peeler and start peeling off long curls into a colander.  Sprinkle with salt and let drain over the sink for about 20 minutes.  This will help the squash sweat off some of the moisture.  Dump onto a large surface covered with paper towels and use paper towels to blot off liquid, then dump squash curls in large salad bowl.
  2. Add the celery, onion, and peppers to the bowl.
  3. Put the dressing ingredients in a separate bowl and whisk together until well combined. (You could also put the dressing ingredients in a jar with a good lid and shake to combine.)
  4. When dressing is well mixed, immediately drizzle a little over salad, mix, taste, and add more dressing as desired, tossing to coat after each addition.
  5. When the slaw has the right amount of dressing, serve immediately or chill until ready to eat.
You'll have enough for about 4 to 6 people.
Enhanced by Zemanta

More Interesting Salad Recipes:
    

Monday, August 8, 2011

Got Zucchini? Try These Gourmet Garden Salad Ideas

From beginner to seasoned, gardeners all have one thing in common – zucchini.  Every gardener knows the pleasure, and the pitfalls, of planting zucchini.  We're talking about the all-time winner in vegetables that run amok. (I literally have almost 10 lbs of zucchini in my fridge right now!)

Different types of zucchuniImage via WikipediaIf you plant even two hills, you will no doubt have more than enough to feed your family zucchini every day of the week and give away bushels to every neighbor within a ten mile radius. You will also get very, very tired of it and end up wasting more than you use.  That is, unless you come up with new ways to serve this abundant vegetable.  That's where learning how to create gourmet salads using zucchini comes in.

Lots of Choices for this Prolific Favorite

The first rule of using zucchini in gourmet salads is to pick them small.  Young zucchini are perfect for fresh green salads.  At this small size, you'll find the entire zucchini is firm and tender, without a seedy or pulpy inside. You don't even have to peel them, just scrub them and cut them up.  You can slice the zucchini into very thin discs, use a peeler and shave them into curls (I make a yummy summery zucchini pasta salad with these!), cut them into thin 'shoestring' style, or dice them if you prefer.  Remember, harvest them when they are tiny and you will have the perfect zucchini for salads.

Now the sky's the limit when it comes to salad fixings.  Use the zucchini as the base and toss with crispy red bell peppers and sweet onions in a vinaigrette dressing.  Let sit for a few minutes so the zucchini absorbs the flavor and you have a gourmet salad that will please any summer salad fanatic. Or toss together a simple salad using equal amounts of sliced zucchini and  tomatoes, with fresh basil chiffonade and a lemon and oil dressing. You can also give it an Asian flavor by adding a sesame dressing with lime juice, ginger and a couple of drops of fish sauce.

Make a tart, tangy, or spicy zucchini salsa or relish to serve on top of hearty greens like baby spinach, arugula, mustard greens, or kale.  Mix tiny diced zucchini with diced cucumbers, chilies, green peppers, scallions, and herbs of your choice, and top with a drizzle of red wine vinegar and olive oil, with a sprinkling of kosher salt.  Let sit for a few minutes so the flavors blend, then serve over a cold bed of greens.  Sprinkle a bit of bleu cheese or feta on top for the full gourmet deal.

In the Beginning, There Were Blossoms

But, before we even get to those young zucchini plants, have you noticed the bright yellow blossoms peeking out from underneath the big leaves?  Those zucchini blossoms are your first opportunity to create a gourmet delight!

Gathering zucchini blossoms isn't tricky, but you don't want to ruin your zucchini crop in the process.  Look for blossoms that are on the end of a thin stem.  These are the 'male' blossoms and  the ones you want to pick. Of course, you can pick a very small zucchini with the blossom still attached and use it like that.  But, if you pick too many of these 'female' blossoms, your zucchini crop will slow down.

ZucchiniImage via WikipediaBecause the zucchini blossoms are so delicate, they don't last long off the stem.  Pick and prepare the blossoms the same day.  Gently wash the blossom and take a sharp paring knife and remove the spiky green parts just above the stem surrounding the blossom on the bottom.  Cut the stem off to about a half inch or so. Then, use your knife to cut the blossom open lengthwise to 'butterfly' it.  You'll see the stamen or pistil; be sure to remove this.  Wash off any pollen or dirt that may have been left inside the blossom.

Now you have a gourmet garden treat that will impress even the greatest salad chef!  Use the blossom as is to garnish your zucchini salad, or batter and fry it for a crispy surprise.  Serve two or three fried blossoms on top of a green salad with zucchini relish for a special luncheon or light dinner.  This is surely look and taste like a gourmet treat.

When you think of zucchini dishes, you most likely think of a skillet filled with zucchini, onion, tomato, and cheese.  Perhaps you think of bread.  But, you don't have to serve the same zucchini dishes if you know how to pick and serve zucchini at their tender best.  Once you get a taste of  tiny, fresh zucchini tossed perfectly in a gourmet salad, you may start plotting to add an extra hill of zucchini plants to your garden next year!

Enhanced by Zemanta

Friday, August 5, 2011

Video - How to Make Jams & Preserves

Here is a short but very comprehensive video that shows step-by-step how to make berry jams and preserves. It includes ingredients and equipment needed, and step-by-step instructions for each part of the process - all in less than 4 minutes!  This one is definitely worth checking out, whether you've never made jam before, or just need a refresher.

Preserve some of those delicious summer berries for later!

How To Make Jams and Preserves
Expand the description and view the text of the steps for this how-to video. Check out Howcast for other do-it-yourself videos from goluxx and more videos in the Sauces, Dressings & Condiments category. You can contribute too! Create your own DIY gui...


Helpful Canning Equipment:
    
Enhanced by Zemanta

Wednesday, August 3, 2011

Preserving Summer's Fruit Bounty: Dry It

This time of year, pretty much everyone in the northern hemisphere has easy access to lots of yummy fruit and veggies. My fridge is filled every Wednesday with produce from my CSA, and my own garden is not far behind. This time of year we really don't want to think of the winter months, but if you find yourself overwhelmed with produce, now is a great opportunity to preserve some of the bounty for future use. We shared a freezer jam recipe on Monday, and a quick internet search will yield many more. But another great way of preserving foods is to dry them - this works particularly well with fruits.

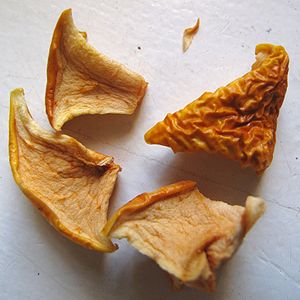
Dehydrated Apple piecesImage via WikipediaDried fruits can serve as a healthy alternative to candy. Instead of reaching for chocolate or a piece of hard candy, the kids will reach for a dried pineapple or apple slices. The sweetness of the fruit is concentrated when it is dried and bursts forth with every bite.

Learning to dry fruit is a fairly easy process. You don’t need to buy any fancy equipment. Investing in a few sealing jars would be nice so that storing the fruit will be easier, but it isn’t a necessity. Sealing jars can be found fairly inexpensively at many supermarkets.

To start, gather all of the fruits you want to dry. Most fruits make good choices. Some of the more common ones are: pineapples, apples, plums, grapes, apricots, and tomatoes (yes they are a fruit!). If you favor lemons, limes, or other citrus fruits, you will be drying the peels and not the fruit itself.

All fruit and equipment need to be clean and thoroughly dried before beginning. Drying racks are needed if you plan on air drying outside or using an oven. Some pieces may be done before others so rotating the trays in the oven gives you a chance to remove any fruit that is already dried and replace with another.

Slice the fruit into small pieces. Apples need to be cored and peeled before slicing. Tomatoes can be cut into slices or quarters and salted before drying. Grapes and plums are okay as is because the skin doesn’t affect their taste.

Tomato slices.Image via WikipediaIf you prefer to use the microwave to dry your fruit, place small batches in the microwave on the turntable tray. Fruit pieces should be evenly spaced to allow for air circulation while drying. Set the microwave to the defrost setting in order to dry the fruit. It will take about thirty to forty-five minutes. Check after thirty minutes and gradually add time as needed. It is not recommended that tomatoes be dried via the microwave because they should be dried at approximately 120 degrees for about twenty-four hours.

You can eat some of these tasty treats as soon as they are dried or you can save some for later. If storing for later, let the fruit cool before placing in sealing jars or zipped plastic bags. Dried fruits will keep two weeks or longer in a cool dark place (longer if refrigerated). However, these fruit treats are so scrumptious they may not even last for that long.

Electric food dehydrator - multiple trays stac...Image via WikipediaDried fruit has a multitude of uses. It can be eaten as is or as a flavorful addition to ice cream, salads, pizzas, and more. Drying your fruits can save you money because it makes the fruit last longer than normal, and avoids spoilage, so you can have it on hand for longer.

Note: If you don't want to dry it in the oven, or you plan to be drying a lot of fruit on an ongoing basis, you may wish to invest in a dehydrator. They aren't terribly expensive, and you can find them fairly easily nowadays. A couple of examples are shown below.

Dehydrators for Fruits & Vegetables:
    
Enhanced by Zemanta

Monday, August 1, 2011

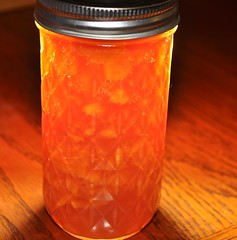
Recipe - Peachy Freezer Jam

This time of year, I am tempted to start preserving some of the bountiful fruits & veggies for the colder months (much as I don't want to think about that right now!). I will try to share a few recipes and articles related to preserving foods over the next couple of months. One of the best ways to ensure you have good healthy food year round is to preserve it yourself during the summer months. Today I will share a nice recipe for freezer jam. Freezer jams are nice because they are easy, safe, fresh, and tasty. I have lots of fresh peaches these days, so I plan to make some of this myself soon!  Try it out, and let me know what you think.

Mmm...peach jamImage by jeffreyw via Flickr
Peachy Freezer Jam: (makes 4 pints)
 
What You Need:
3 lbs peaches
2 TB ginger
5 C sugar
2 pkgs (1 3/4 oz) powdered pectin
1 C cold water
4 (1 pint) freezer containers with lids

How to Make It:
  1. Remove the pits from the peaches and peel. 
  2. Chop peaches up very fine to make about 4 C. 
  3. Place peaches in a large mixing bowl. Add ginger and stir together. 
  4. Slowly add the sugar and mix until well combined. 
  5. Place the cold water in a small saucepan and place over medium heat. Add the pectin. 
  6. Bring to a boil being sure to stir continuously. 
  7. When water comes to a rapid boil cook 1 minute. 
  8. Remove from heat and pour into fruit. 
  9. Stir until all is combined. Continue to stir 4 minutes. 
  10. Pour mixture into the 1 pint freezer containers and cover with lids. 
  11. Leave standing at room temperature for 1 full day (24 hours). 
  12. Freeze for up to 6 months.
When ready to use remove from freezer and allow to come to room temperature about 1 to 2 hours. Once thawed, freezer jam will stay good in the refrigerator for up to 3 weeks.
Enhanced by Zemanta

More Jam & Preserves Recipes: